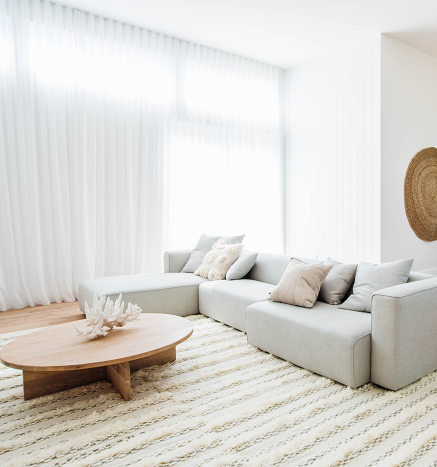
The easy way to install designer curtains.
Welcome to our simple guide to installing your new, custom designer curtains. Your custom kit is super easy to use, so have fun as you click and lock parts together.
Before you get going
Your custom kit:
Because we know how easy it is to lose small parts, you may get a few extras in your kit.
 A
A
 B
B
 C
C
 D
D
 E
E
 F
F
 G
G
 H
H
 I
I
OK it's time to start installing,
let's take it step by step
Installing your curtains is easy and fun. Follow these 6 steps, then kick back and admire a job well done. Here's how to do it:
1 Get organised
-
A
Unpack your kit, and gently lay it all out on a clean, hard surface or the cardboard packaging it came in.
-
B
Lay your track near your window to check the width and make note of where it will be installed.
For 2 or more pieces of track, lay your track joiner(s) on the floor and click an end of two tracks into it, so the ends meet in the middle of the track joiner. The track joiner(s) will be in the middle for centre opening curtains or on the least visible side if your curtains stack left or right.
-
C
Check how many brackets you need for your track width. Lay out the brackets next to your track and space them 600 mm apart. This is the standard distance between ceiling battens.
For 2 or more pieces of track, you'll also need two brackets on either side of the track joiner(s). Lay out these brackets at least 85 mm apart, as the joiner is 85 mm long.
2 Mark your ceiling battens
-
A
If your ceiling battens run lengthways, use your stud finder to find your ceiling battens. Make a pencil mark on each ceiling batten that your curtains will cover, 35 mm out from your wall or out from any window frames or roller blinds that project out. These marks are where the back of your brackets will line up.
If you have a double track, make a second set of pencil marks on each ceiling batten that your curtains will cover, 145 mm out from your wall or out from any window frames or roller blinds that project out. These marks are where the back of your brackets will line up for your front track.
Your brackets will screw into your ceiling battens, and you'll need brackets near both ends and the middle of the track.
-
B
If your ceiling battens run widthways, use your stud finder to find the ceiling batten that your curtains will hang from, and make pencil marks along the batten. The ceiling batten needs to be at least 35 mm out from your wall.
If you have a double track, use your stud finder again to find the ceiling batten your front track will hang from, and make pencil marks along the batten. The ceiling batten needs to be at least 145 mm out from your wall, so there's enough space for two tracks.
Your brackets will screw into your ceiling batten, and you'll need brackets near both ends and the middle of the track.
-
C
Can't find ceiling battens? Don't stress! Ceiling battens are the best surface to attach curtains to, so call us if you need some help finding your battens. Remember you can use plaster wall anchors if you can't find your ceiling battens.
Screwing into concrete, stone, brick or tile? You can skip this step completely.
3 Screw in your brackets
-
A
Position the back of each bracket in line with the pencil marks on your ceiling battens, and mark the screw holes with a pencil.
For 2 or more pieces of track, don't mark up and screw in your middle brackets either side of the track joiner(s) just yet.
-
B
Using your protective eyewear and your cordless drill with the 3 mm drill bit, drill each hole. Look for wood shavings as a sign that you're drilling into the ceiling battens.
-
C
Screw your brackets part way into your ceiling so they're still a bit loose, using your cordless drill with the Phillips head drill bit and the screws in your custom kit.
Using plaster wall anchors or screwing into concrete, stone, brick or tile? Call or email us for guidance on attaching to different surfaces.
4 Click in your track
-
A
Pick up your track and click it into the middle bracket.
-
B
Tighten the screws in your middle bracket using your cordless drill, to fix the track in place.
Click your track into the other brackets and tighten the screws, checking as you go that the track is fixed securely in place.
If you have a double track, just follow the same steps to click in both tracks.
For 2 or more pieces of track, click your joined tracks into your brackets. Pick up your middle brackets and place them either side of your track joiner(s), then mark up with a pencil where you'll attach them. This will ideally be onto ceiling battens.
Unclick your joined tracks and follow step 3 to screw in your middle brackets. Then follow step 4 to click your track back in to all brackets and secure it by tightening the screws.
If you have a double track, just follow the same steps to click in both joined tracks.
5 Click in your curtains
-
A
Check the top of your curtain panels and make sure there's a pendant or hook attached to each press stud.
Missing a pendant or hook? Simply grab a spare pendant or hook from your custom kit and click it onto the press stud, where the pendant or hook is missing.
-
B
For S fold curtains, click each pendant into your track, starting at one edge. Take care not to miss any pendants. Make the S shape as you go, by folding the fabric alternately forwards then backwards.
If you have a double track, click the curtains into the rear track closest to your wall first, then repeat for the front track.
-
C
For pleated curtains, attach each hook into your track. Take care not to miss any hooks.
If you have a double track, click the curtains into the rear track closest to your wall first, then repeat for the front track.
6 Get Insta ready
For S fold curtains, you’re ready to help your curtains form perfect S Folds. Starting at the top, ensure the heading is shaped as an S. Once you’ve dressed the heading, you can start to dress the body of the curtain. Work sequentially from one side of the curtain to the other, ensuring each S fold follows from the top of the curtain to the bottom of the curtain when they’re drawn open.
An S fold curtain is a structured heading, which means you only need to dress the heading the first time they’re installed and never again. The heading does all the work, offering you effortless luxury. If your curtains ever do get messy, all you need to do to tidy the folds is run your fingers through your curtains and manipulate the fabric to follow the folds from the heading at the top, to the bottom. That easy.


Congrats, you did it! Before you kick back and admire a job well done, don’t forget to snap some photos and share your look with us. And tag us on Instagram to really make our day.
I need some extra help
Have a question? We’re here to help
1300 918 390
Mon to Fri 8am - 6pm & Sat 10am - 3pm


