Need design support? We're here.

Get help

What you'll need to measure

People Icon

1-2 people

Time Icon

less than 10 mins

What you'll need to measure

  • your tape measure (metal is best)
  • your step ladder
  • a pen and some paper

Before you get going

Curved tracks are only available with our residential track style.

Our curved tracks are only available with our residential track style. Designer tracks are not available.

Have you decided how your curtains will fit?

This is where the fun starts! If you’ve already landed on the perfect fit for your bay windows, then you’re good to go. Otherwise don't stress, we'll walk you through the design options below.

Have you checked your bay window angles?

Our curved curtain tracks are custom made to fit beautifully into bay windows of any size. Our 90 degree curved track is perfect for a bay window with 90 degree angles, also known as a box bay window. Our 45 degree curved track looks breathtaking in bay windows with 45 degree angles.

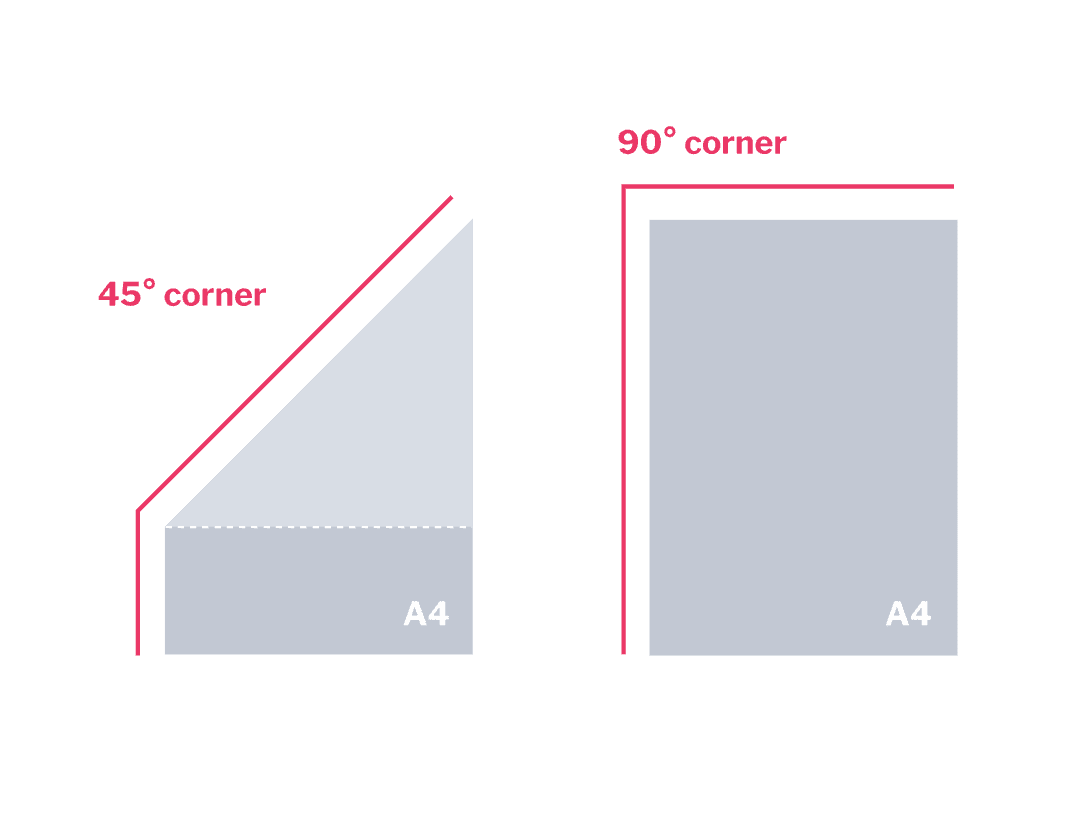
To check if your angles are 45 degrees grab an A4 piece of paper. Fold over a corner to touch the opposite side of the paper and so the edges on both layers of paper line up. Place the paper into a corner of your bay window. If both sides are flush with your window then your angle is 45 degrees.

To check a 90 degree angle you can hold up an A4 piece of paper into your corner and if the paper fits snugly you have a 90 degree corner.

Do you have cornices?

You can fit curtains onto your wall or inside your cornices from your ceiling, it's up to you. Check our latest projects for ideas to show off gorgeous details like cornices in your home.

Do you know what surface your curtains will attach to?

Our curtains attach to most surfaces, though it's always best to do your homework. Wall studs and ceiling battens are by far the easiest to attach to.

Order your free samples!

Get touchy feely with our stunning, designer fabrics. It's the best way to choose the perfect look for your home.

Designing your dream curtains

The fun starts with designing how your curtains will fit, so channel your inner stylist and get creative! This is about finding your dream look and getting custom curtains that fit and function perfectly.

Onto your ceiling - Ceiling mount
Onto your wall - Face mount

Curtains that hang from your ceiling are called ceiling mount:

Give a sense of space and draw focus to the height of your room
Curtains are best attached to ceiling battens
Our curved tracks are perfect for bay windows with 45 degree and 90 degree angles
Great option for a straight edge ceiling and to fit inside cornices
Opt for curved double tracks to layer curtains
Choose from 2 finishes - just off the floor or puddled
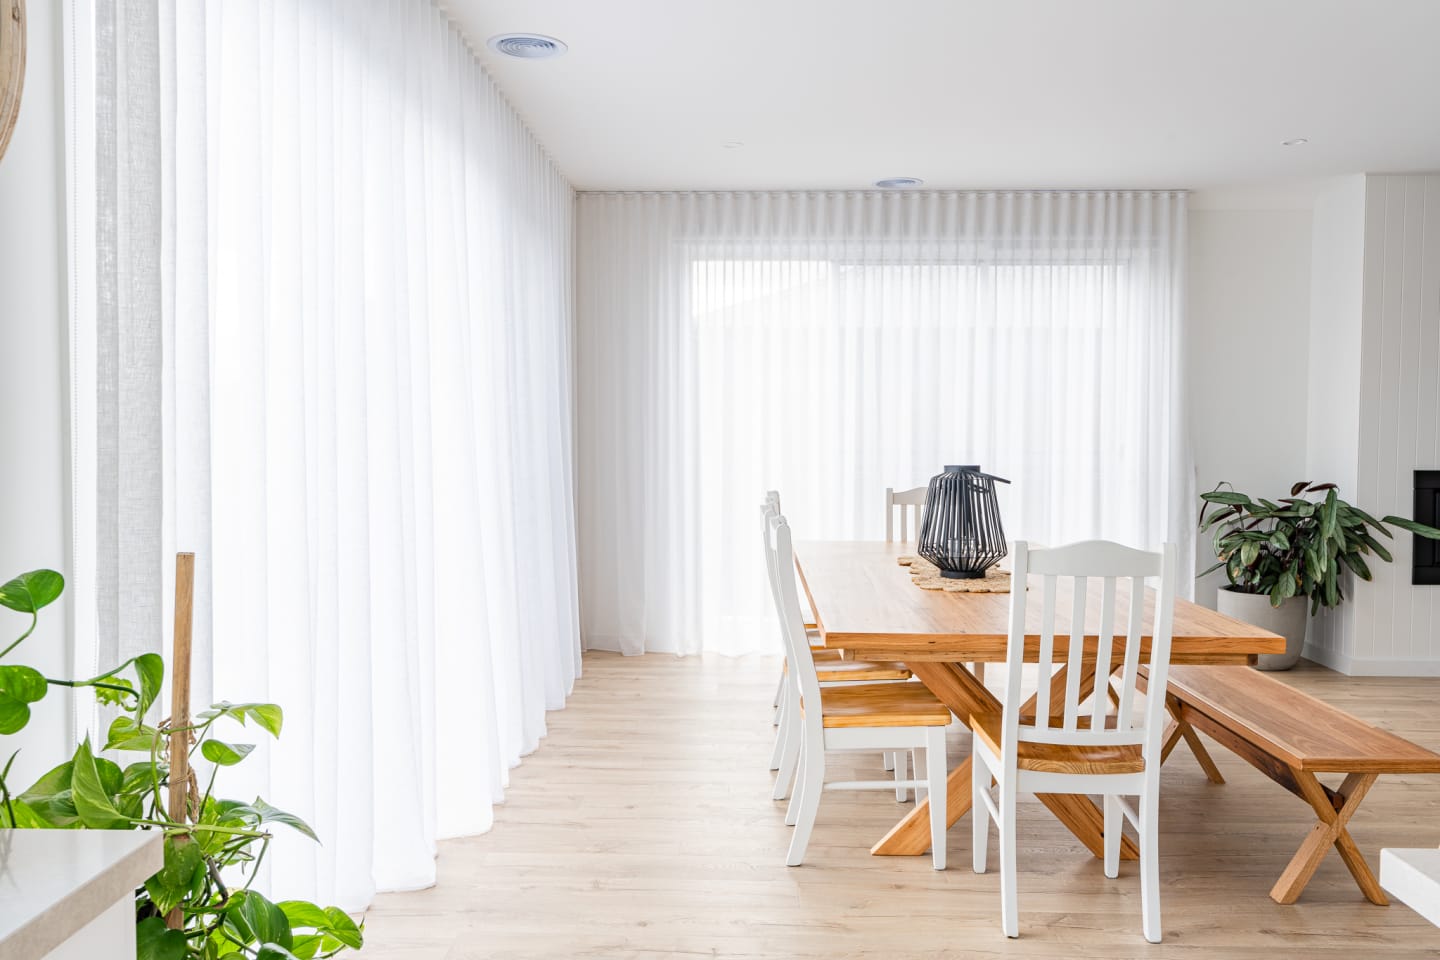
Go for sheers for a soft and floaty look and blockout fabrics to stop all light coming in
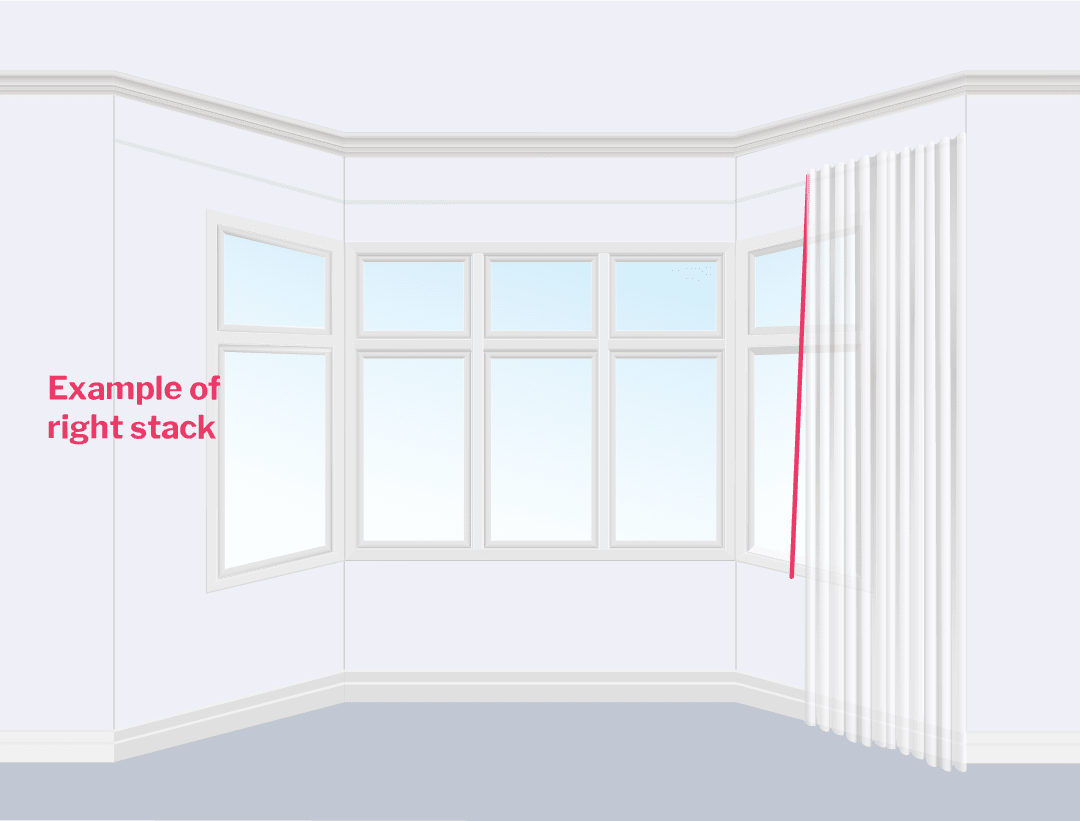
Keep it on trend with a left stack or right stack
Pick a centre opening for easy access to your windows, or multiple openings for custom off-centre splits
Customise your track flow by choosing a fixed flow or free flow
Get the luxe look with an S fold or go traditional with pleated curtains
For larger drops go for a longer wand or no wand at all
Pick your perfect hem and for premium linens opt for our 100 mm hem for a luxe look
Opt for residential tracks in white to blend with light walls, or black or silver to tie in with similar features in your
Home (no designer track option for curves)
Combine curtains with roller blinds, giving you all the options to control light and privacy
Look beautiful in period homes with high ceilings and ornate features like cornices
Curtains are best attached to wall studs and also attach to concrete, stone, brick or tile
Our curved tracks are perfect for bay windows with 45 degree and 90 degree angles
Opt for curved double tracks to layer curtains
Choose from 2 finishes - just off the floor or puddled
Go for sheers for a soft and floaty look and blockout fabrics to stop all light coming in
Keep it on trend with a left stack or right stack
Pick a centre opening for easy access to your windows, or multiple openings for custom off-centre splits
Customise your track flow by choosing a fixed flow or free flow
Get the luxe look with an S fold or go traditional with pleated curtains
For larger drops, go for a longer wand or no wand at all
Pick your perfect hem and for premium linens opt for our 100 mm hem for a luxe look
Opt for residential tracks in white to blend with light walls, or black or silver to tie in with similar features in your home (no designer track option for curves)
Combine curtains with roller blinds, giving you all the options to control light and privacy

OK it's time to start measuring, let's take it step by step.
Onto your ceiling - Ceiling mount
Onto your wall - Face mount
1

Check your corner angles

Check that the angles in your bay window corners are 45 degrees or 90 degrees (at a right angle). If you're not sure or your angles are different contact us and we will help!

To check if your angles are 45 degrees grab an A4 piece of paper. Fold over a corner to touch the opposite side of the paper and so the edges on both layers of paper line up. Place the paper into a corner of your bay window. If both sides are flush with your window then your angle is 45 degrees.

To check a 90 degree angle you can hold up an A4 piece of paper into your corner and if the paper fits snugly you have a 90 degree corner.

2

Measure your widths

For your curtains to cover all 3 sides inside your bay window measure the width of your ceiling above the left, middle and right sides of your bay window from corner to corner. Begin at the outer edge of the left side and measure into the corner (where your walls or cornices meet) and write it down. If you have cornices you'll measure from the inside of your cornices.

Measure in the same way for each side of your bay window and write them down. These three measurements will be your track width.

You don't need to deduct anything for your track curves. Don't worry about measuring how much fabric you need, we'll take care of that for you based on your track width.

3
Measure your splits (optional)

A

For multiple openings, you can choose up to 2 custom splits and tell us exactly where you'd like them. Splitting your curtains is a fantastic option for multiple doors or windows, so you can easily move sections of your curtains.

Make a note of how many splits you'd like in your curtains and choose which side(s) of your bay window you'd like the splits on. We will assume that your splits are evenly spaced if you don't give us split measurements.

If you don't want any splits, you can skip to step 4.

B

For one custom split measure the width from the left across to where your split will be and write it down. You're measuring on the wall your split will be on.

C

For two custom splits, measure the widths from the left across to each split position and write them down. For each split, measure on the wall your split will be on.
4

Measure your drop

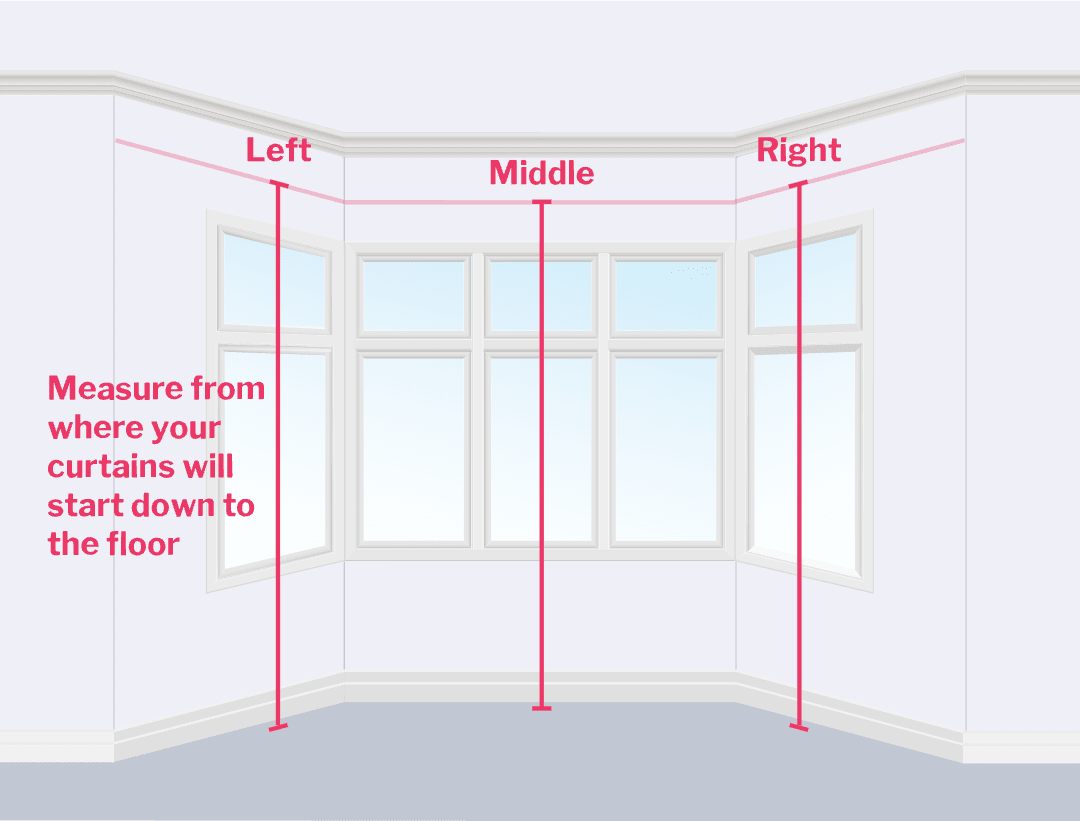
Measure from your ceiling down to the floor above your left side, in the middle and right side. If you have cornices, you'll measure from the inside of your cornice.

Go for puddling if your 3 measurements have a greater than 10 mm difference.
5

Choose your finish

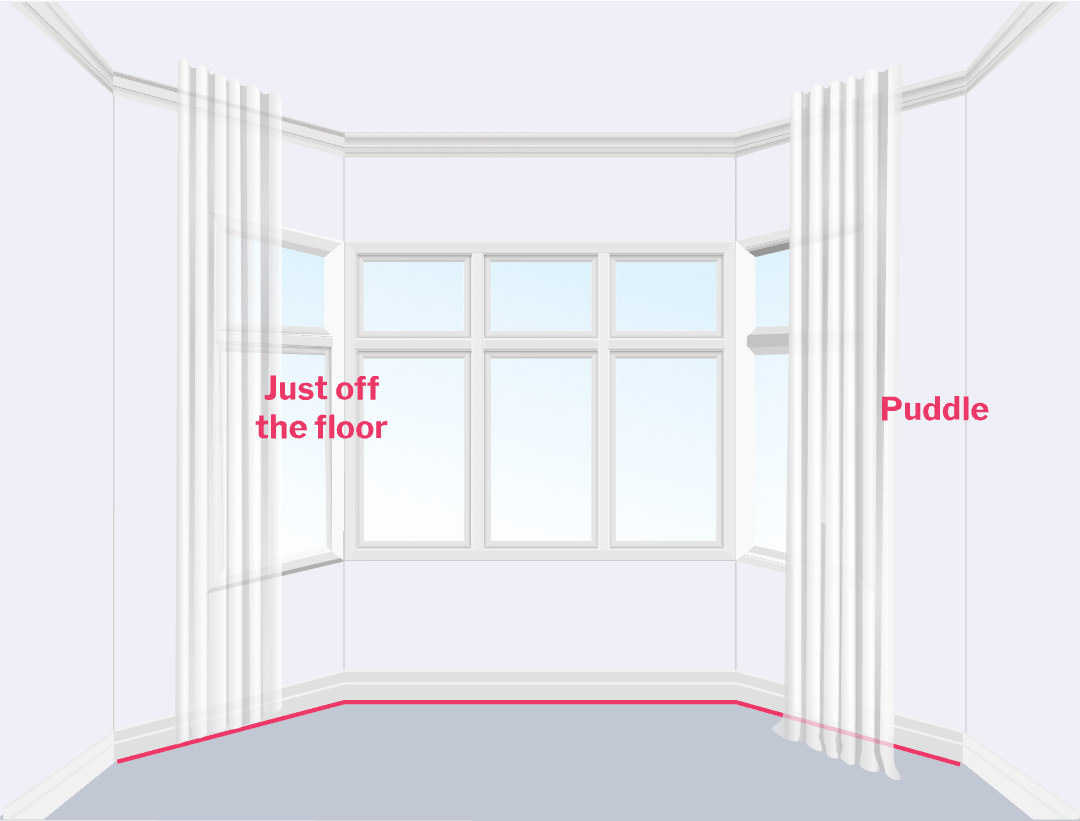
When you design and order your curtains choose from the three finish options below. Please only provide the hard measurements to us and please don't make any deductions or additions. We'll make the necessary adjustments so you get the perfect finish.

If you choose curtains just off the floor they will be approximately 5 - 10 mm shorter than your drop measurement, and they will hover just above your floor. If you choose puddling your curtains will puddle on your floor by 20 mm. If you'd like a larger puddle let us know when you order.
6

Choose your wand

Note down which wand you want. It sounds obvious but the larger your drop, the larger your wand needs to be so you can reach it.

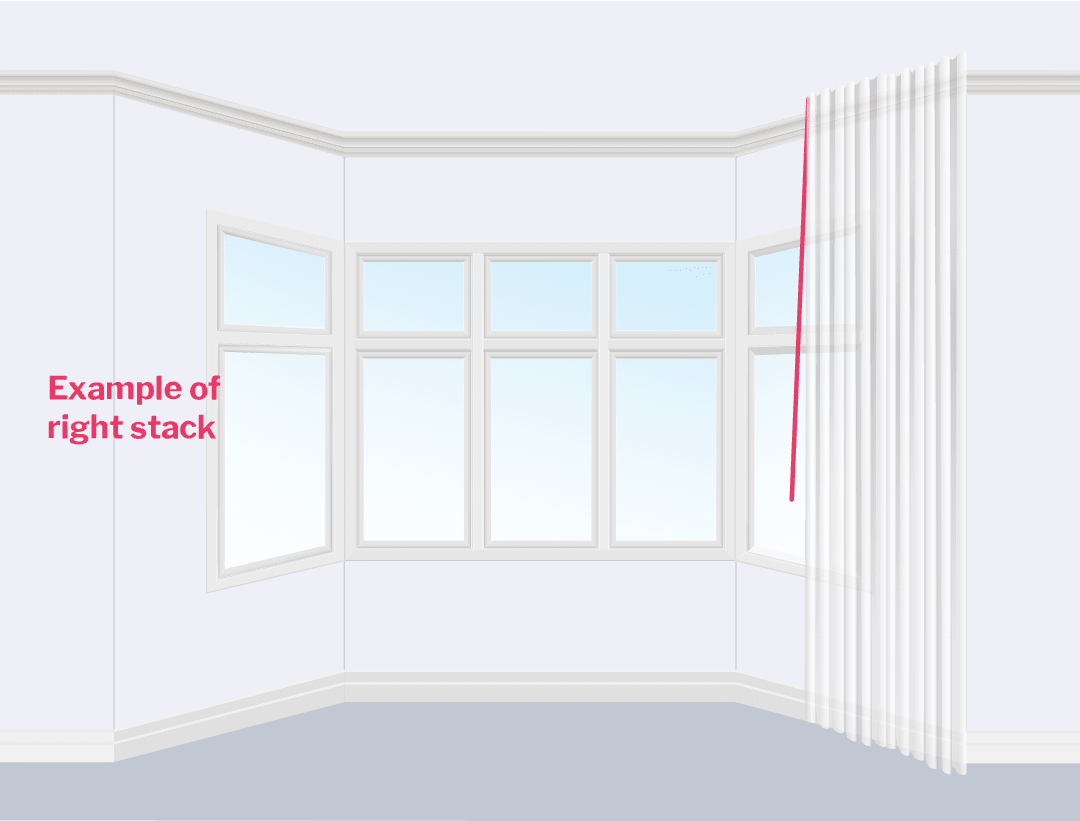
Also note down whether you want left stack, right stack, a centre opening or multiple openings. Think about which side is easiest to reach, obstruction free and which part of your window you'll want to open often.

When you order you'll also need to choose between a fixed flow and a free flow, which is where your curtains open in any direction.

7

Order your custom curtains online

You're all set to order your curved track curtains!

You'll choose your hem option when you order. Just remember you don't need to add any extra to your measurements for your hem; we'll do it for you.

Remember to only give us your exact measurements; don't make any deductions or additions for your chosen finish.
1

Check your corner angles

Check that the angles in your bay window corners are 45 degrees or 90 degrees (at a right angle). If you're not sure or your angles are different contact us and we will help!

To check if your angles are 45 degrees grab an A4 piece of paper. Fold over a corner to touch the opposite side of the paper and so the edges on both layers of paper line up. Place the paper into a corner of your bay window. If both sides are flush with your window then your angle is 45 degrees.

To check a 90 degree angle you can hold up an A4 piece of paper into your corner and if the paper fits snugly you have a 90 degree corner.

2

Measure your widths

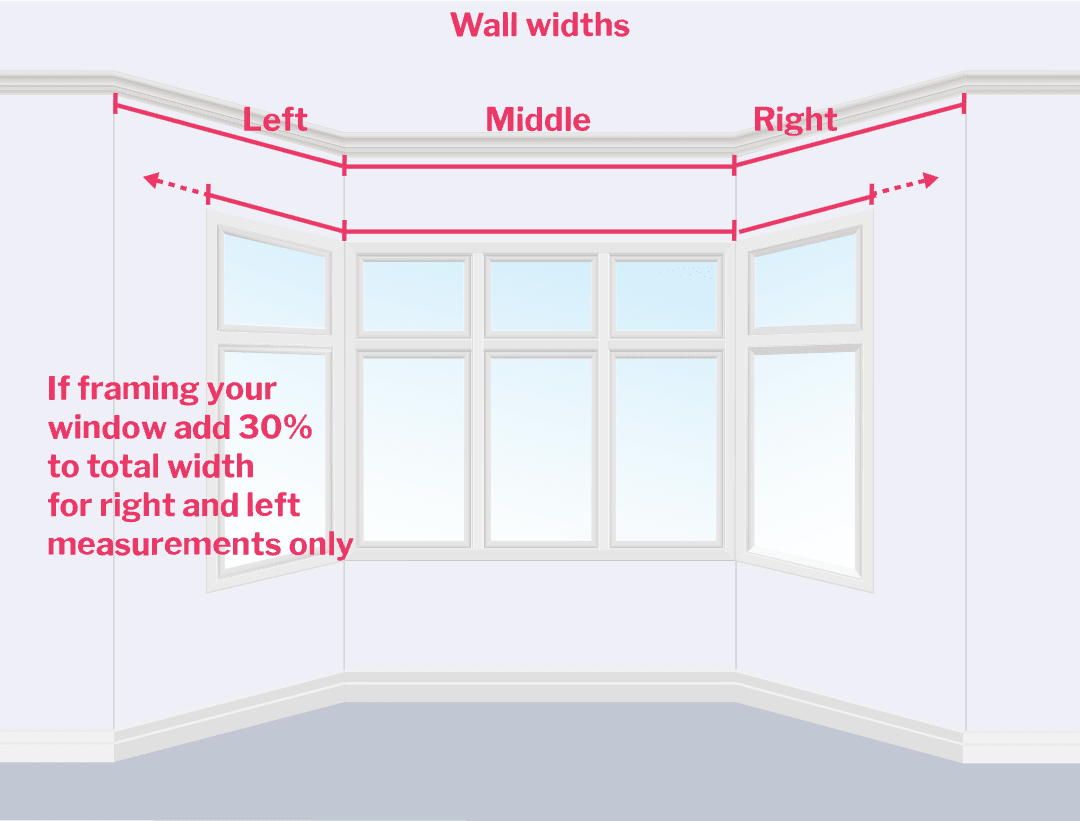
A. For your curtains to cover all 3 sides inside your bay window measure the width above the left, middle and right sides of your bay window from corner to corner. Begin at the outer edge of the left side and measure into the corner (where your walls meet) and write it down. Measure in the same way for each side of your bay window and write them down. These three measurements will be your track width.

B. For your curtains to frame your bay window measure the width above your left window, middle window and right window. Begin above your window in line with the left outside edge of your window frame or recess and measure into the corner (where your walls meet) and write it down. Measure in the same way for each side of your bay window and write them down. Add at least 30% to the left and right window measurements you took so your curtains stack off your window. These three measurements will be your track width.

You don't need to deduct anything for your track curve. Don't worry about measuring how much fabric you need, we'll take care of that for you based on your track width.

3
Measure your splits (optional)

A

For multiple openings you can choose up to 2 custom splits and tell us exactly where you'd like them. Splitting your curtains is a fantastic option for multiple doors or windows, so you can easily move sections of your curtains.

Make a note of how many splits you'd like in your curtains and choose which side(s) of your bay window you'd like the splits on. We will assume that your splits are evenly spaced if you don't give us split measurements.

If you don't want any splits you can skip to step 4.

B

For one custom split measure the width from the left across to where your split will be and write it down. You're measuring on the wall your split will be on.

If you're measuring from the left outside edge of your window frame or recess, add your left stack allowance in mm to your width. Write down this measurement.

C

For two custom splits measure the widths from the left across to each split position and write them down. For each split, measure on the wall your split will be on.

If you're measuring from the left outside edge of your window frame or recess, add your left stack allowance in mm to your width(s). Write down these measurements.

4
Measure your drop

A

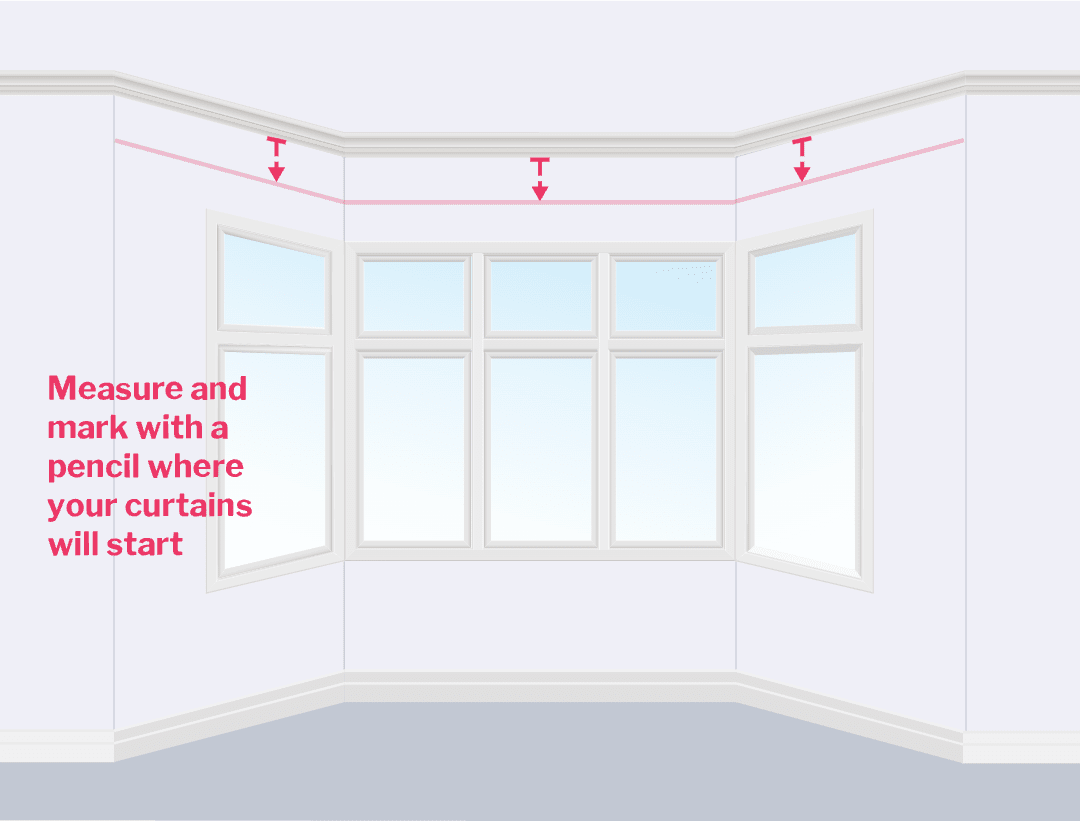
Measure and mark with a pencil where your curtains will start. Use your ceiling or window frame as a reference point, so you get a level starting point across the top. Remember it's best to hang your curtains from wall studs.

B

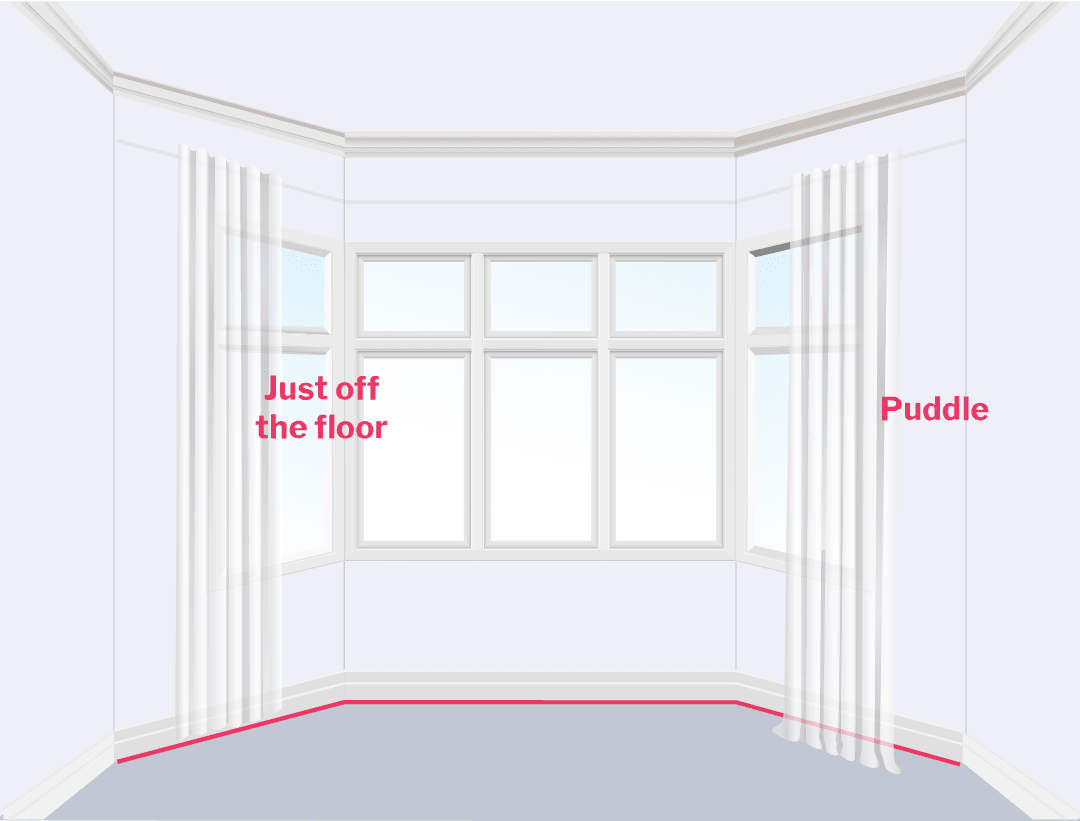
Measure from where your curtains will start down to the floor on the left side, in the middle and on the right side. Go for puddling if your 3 measurements have a greater than 10 mm difference.

5

Choose your finish

When you design and order your curtains choose from the three finish options below. Please only provide the hard measurements to us and please don't make any deductions or additions. We'll make the necessary adjustments so you get the perfect finish.

If you choose curtains just off the floor they will be approximately 5 - 10 mm shorter than your drop measurement, and they will hover just above your floor. If you choose puddling your curtains will puddle on your floor by 20 mm. If you'd like a larger puddle let us know when you order.

6

Choose your wand and how your curtains open

Note down which wand you want. It sounds obvious, but the larger your drop, the larger your wand needs to be so you can reach it.

Also note down whether you want left stack, right stack, a centre opening or multiple openings. Think about which side is easiest to reach, obstruction free and which part of your window you'll want to open often.

When you order you'll also need to choose between a fixed flow and a free flow, which is where your curtains open in any direction.

7

Order your custom curtains online

You're all set to order your curved track curtains!

You'll choose your hem option when you order. Just remember you don't need to add any extra to your measurements for your hem; we'll do it for you.

Remember to only give us your exact measurements; don't make any deductions or additions for your chosen finish.
If you want to order a double track, call us and we'll make it happen.

Ready to install?

How to install curtains

View a step-by-step guide for how to install curtains

How to install curtains
We’re here to help with any questions
Support

We’re here to help with any questions

Whether you're midway through installing your blinds or just getting started, our team is here to help. From measuring guides to installation tips, we’ve got answers to make things simple and stress-free. Contact us on 1300 918 390 (AEDT).