Need design support? We're here.

Get help

The easy way to install plantation shutters

Welcome to our simple guide to installing your new, custom plantation shutters. Your custom kit is super easy to use, so have fun as you click, slide and lock parts together.

What you’ll need to install

People Icon

1-2 people

Time Icon

30-40 minutes

Tools

  • your step ladder
  • a cordless drill with a Phillips head drill bit
  • a 3 mm drill bit
  • a gap seal applicator gun (recess fit only)
  • a spirit level (optional, for a really precise fit)
  • *For large shutters it is best to have a second person help hold the shutter frame in position.

Before you get going

Know what you're drilling into

If you're drilling into wood, follow the steps below

If you're drilling into plaster, you have two options:

  • Use a stud finder to locate where your wall studs are, then follow the steps below.

  • Use Ramset 10 mm Grip Hollow Wall Anchors, which will help secure your shutter to the plaster

If you're drilling into concrete, stone, brick or tile, use a Masonry drill and appropriate plugs, anchors or screws.

To ensure a smooth and safe installation process, please take the following precautions
  1. Verify Measurements

    Before installing your shutters, double-check the final measurements of the supplied products to ensure they match your order and fit the intended space. If there is any doubt, notify us within 7 days.

  2. Confirm Installation Items

    Ensure you have all the necessary components and tools as specified in the installation guide

  3. Follow the Instructions Carefully

    Adhere to the provided installation steps, particularly those indicating where two people are required for safe handling.

  4. Inspect the Area

    Perform a visual inspection of the installation area to identify and mitigate any risks to surrounding surfaces, objects, or structures.

Are your windows, floor and hands clean? Go through your custom kit and make sure everything listed below is there.

Your custom kit

Because we know how easy it is to lose small parts, you may get a few extras in your kit.

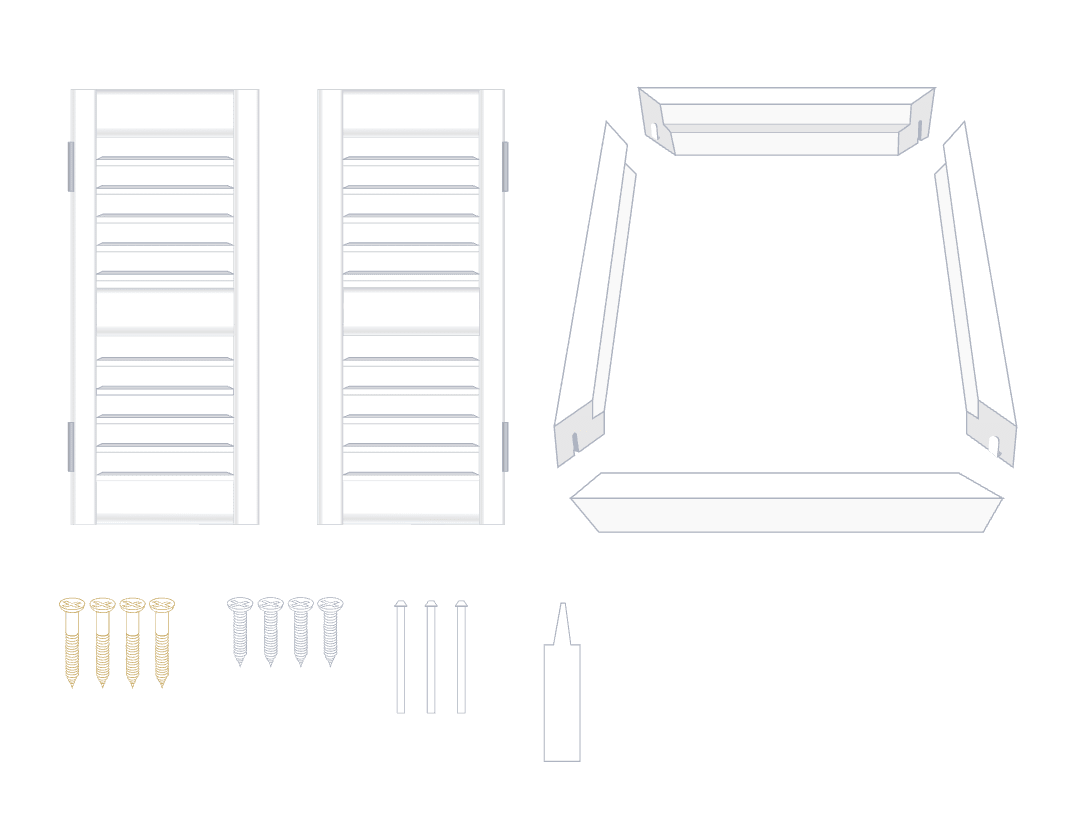
A - Your shutter panels
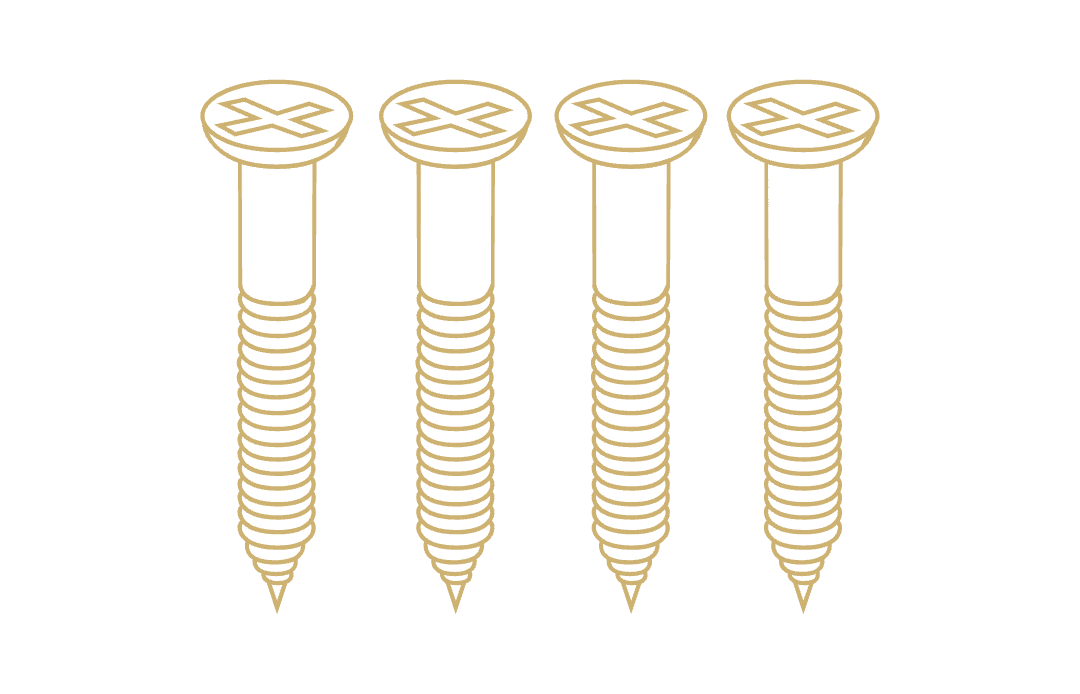
B - Gold Screws (57 mm)

C - White stickers (to hide screws)

D- Hinge packers (just in case)

E- Your shutter frame (in sections)
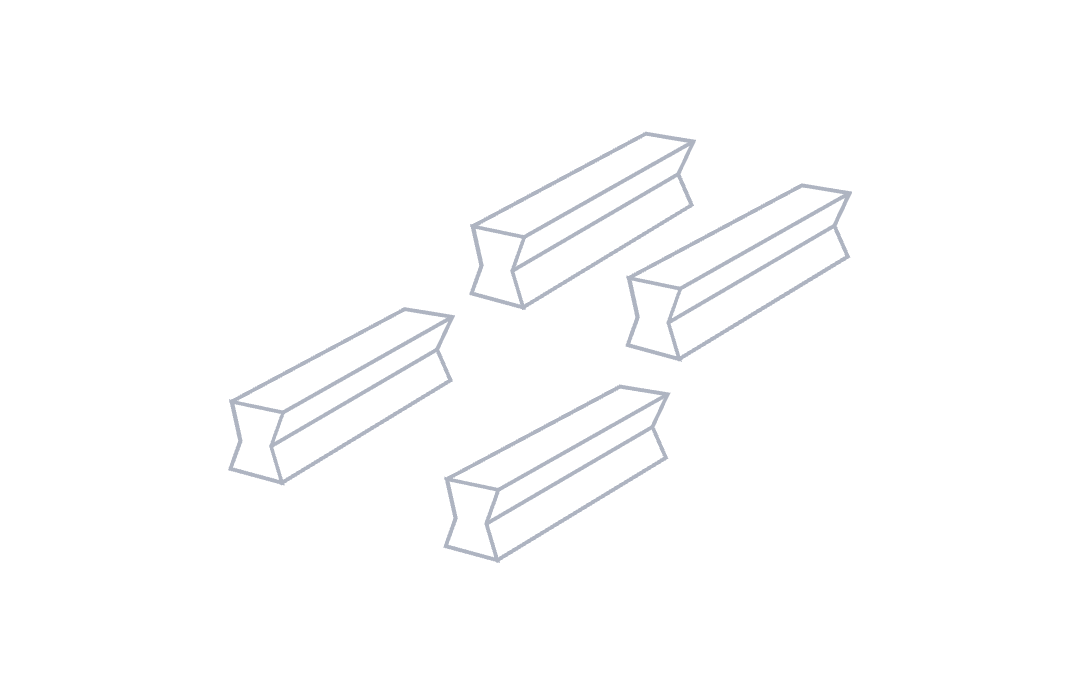
F - Hoffmann keys (attached to sections of your frame)

G - Hinge pins

H - Gap seal (also known as caulk, and for recess fit only)

I - T posts (3 or more panels only)
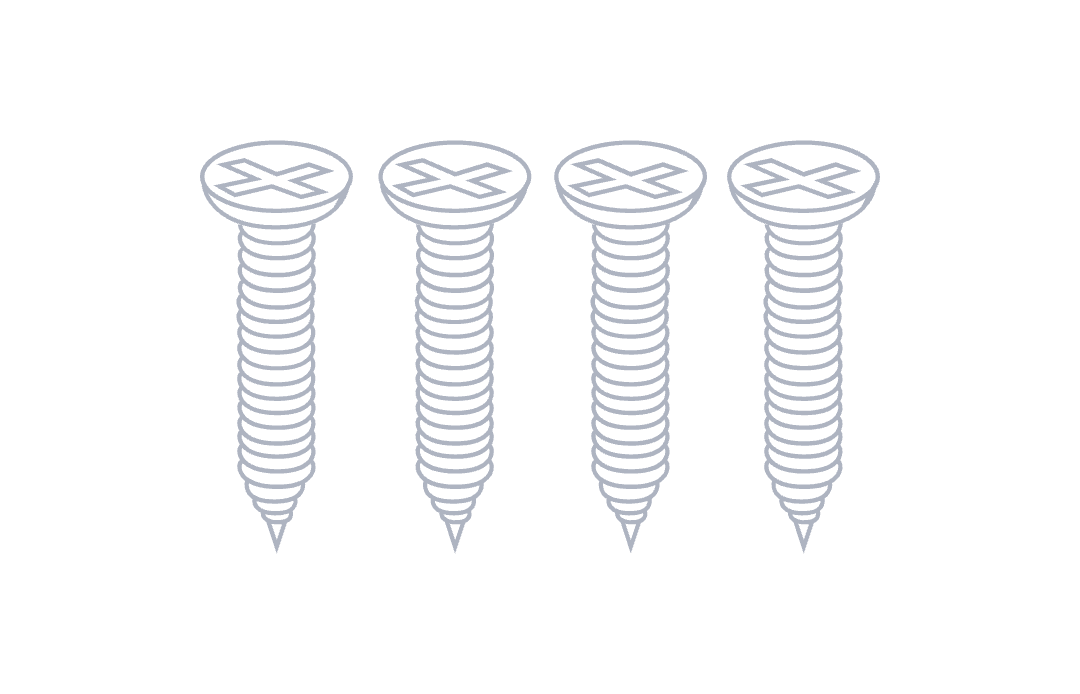
J-Long black screws (for T posts)

K - For direct mount or 3 sided frame: Light blocks
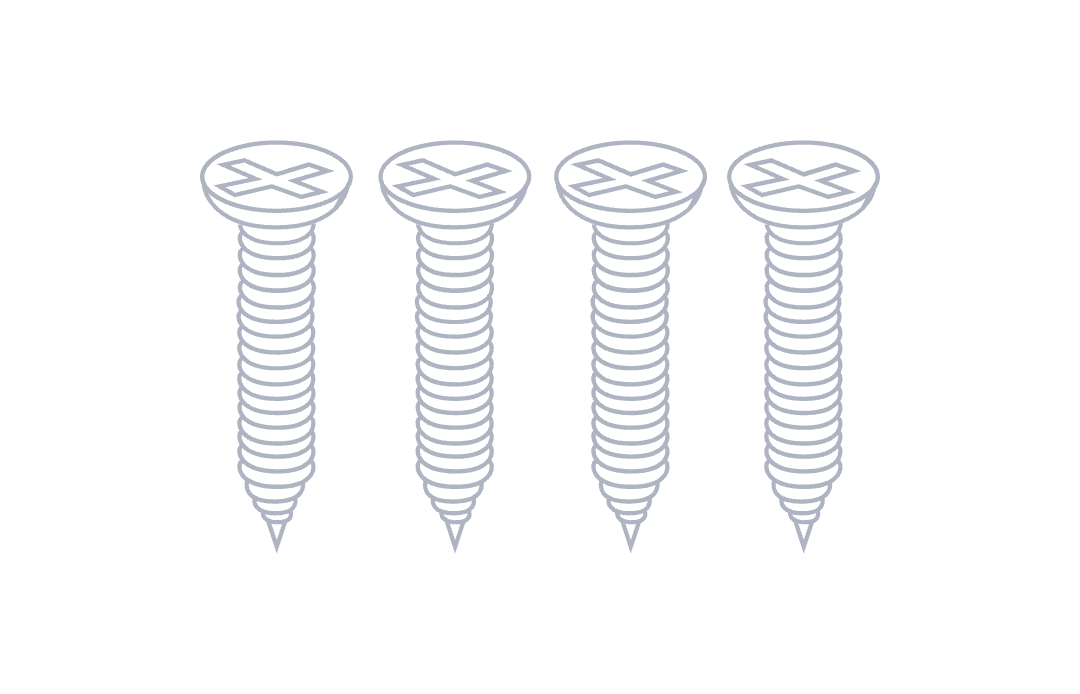
L-Hinge screws

M - Magnet catchers

N - Small screws with white heads

O - T post brackets (3 or more panels only)

OK it's time to start installing, let's take it step by step

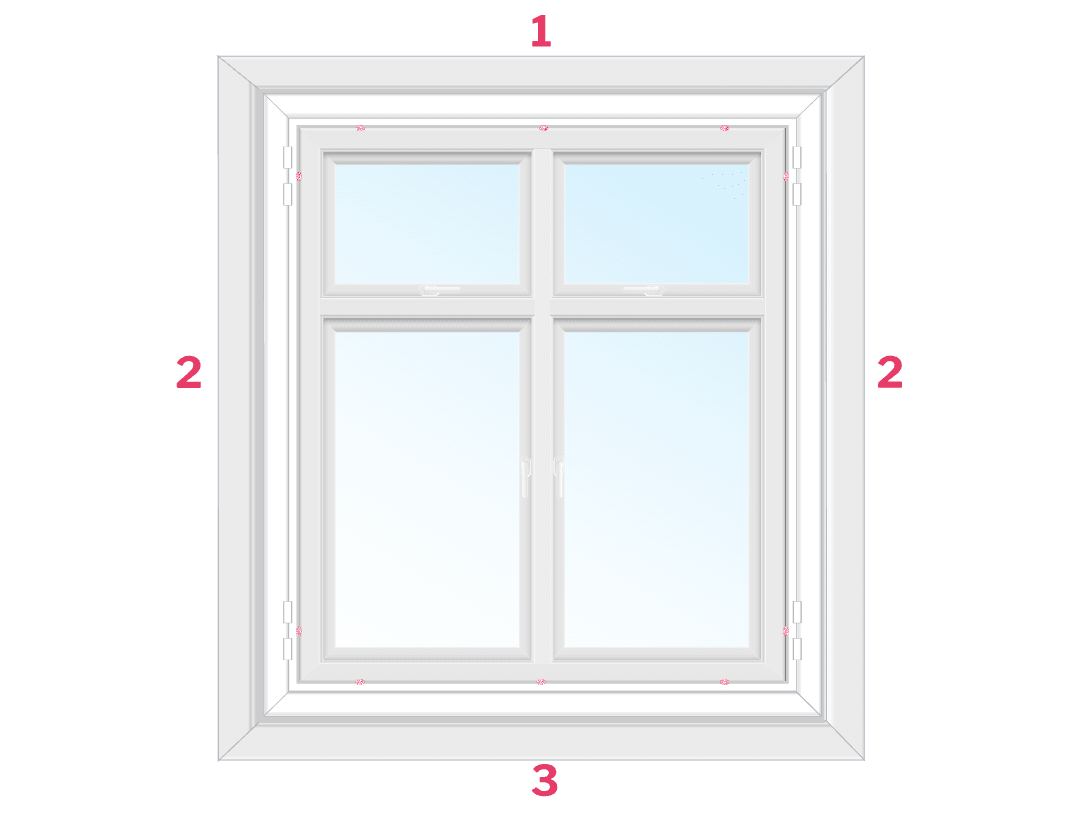
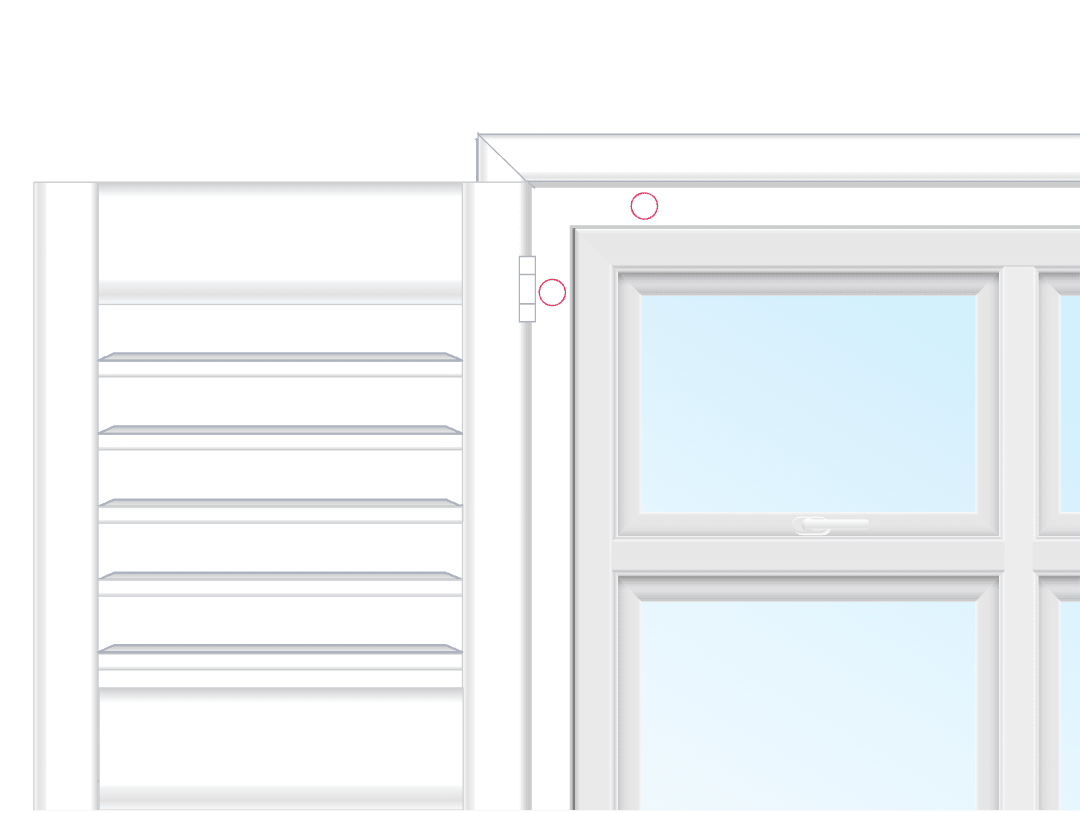
Outside the window frame Face fit
Outside a frameless window Face fit frameless window
Inside the window frame Recess fit
Inside the window frame Direct mount
1
Get organised

A

Unpack your kit, and gently lay it all out on a clean, hard surface or the cardboard packaging it came in. Be careful not to scratch the parts when moving them.

B

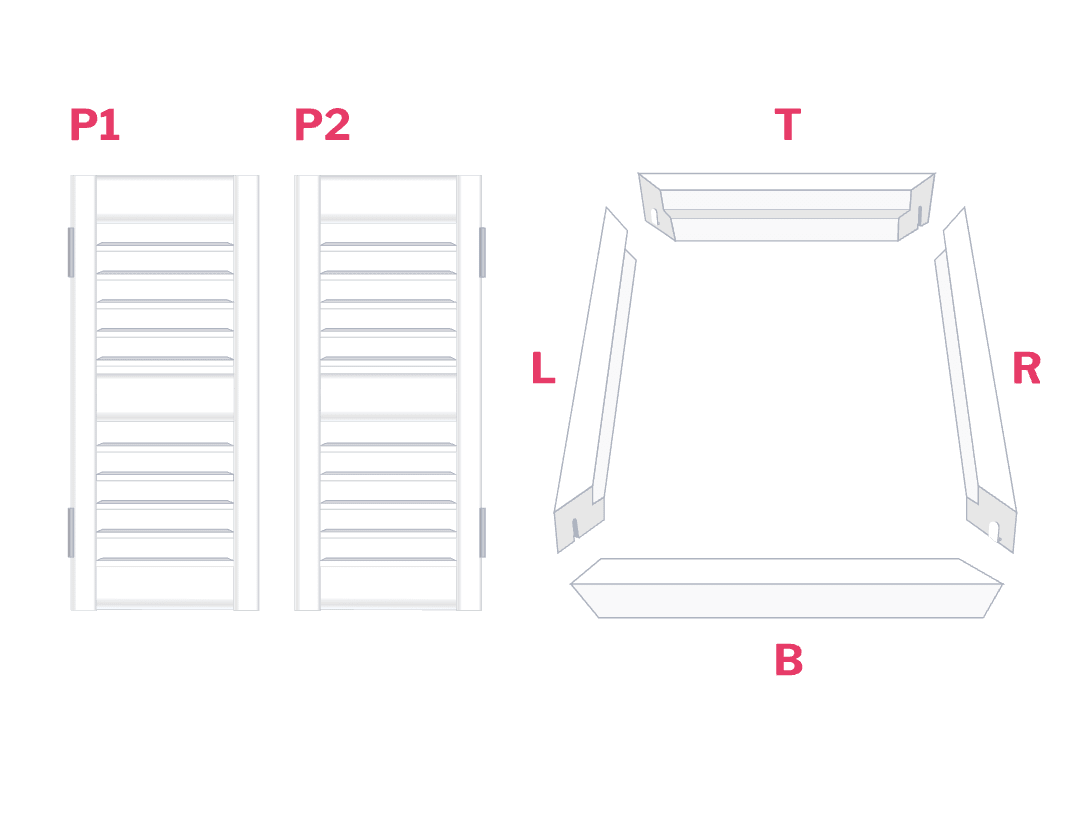
We label sections of your frame and your panels, which will help you to match up the right panels and hinges later. Lay out the shutter panels the right way up and in order from left to right.

2
Click your shutter frame together and screw holes
A

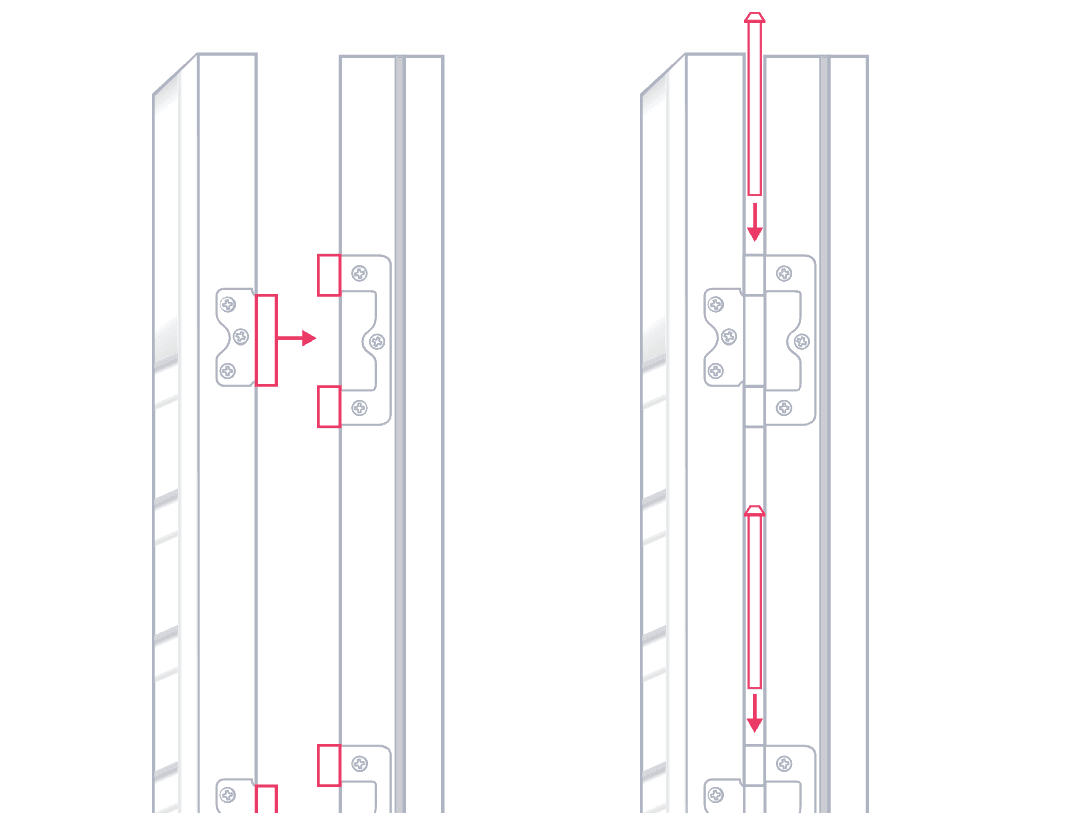
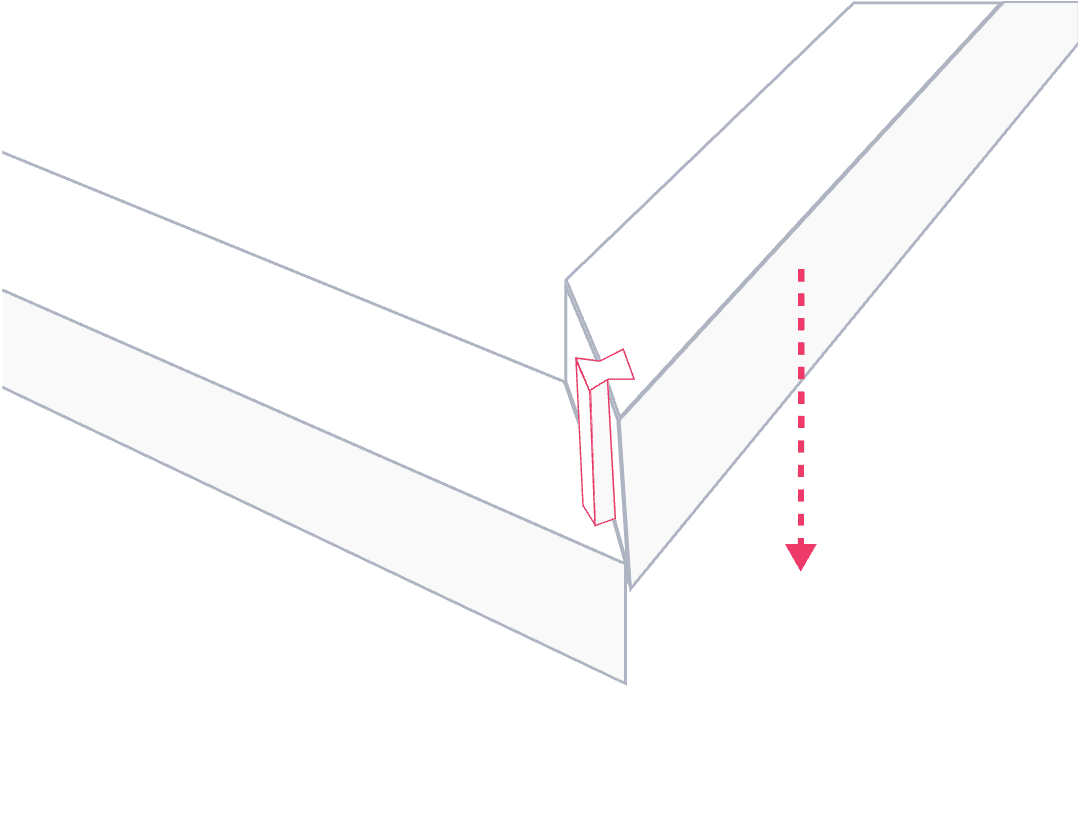
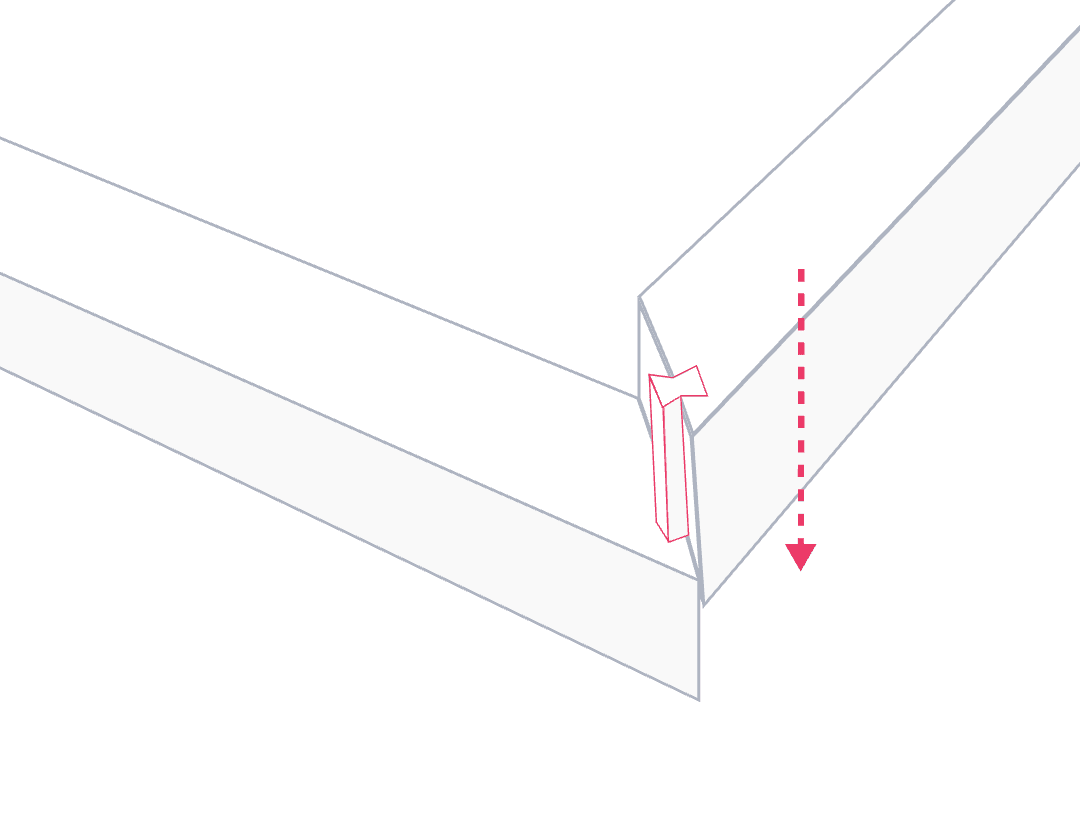
Click each section of your shutter frame together using the Hoffmann keys in your custom kit, and feel free to use your body weight.

The keys come attached to sections of your shutter frame. If they've fallen out that's OK, just slide them back in.

If you're finding it difficult, it's usually because the Hoffmann keys have come out on one side.
B

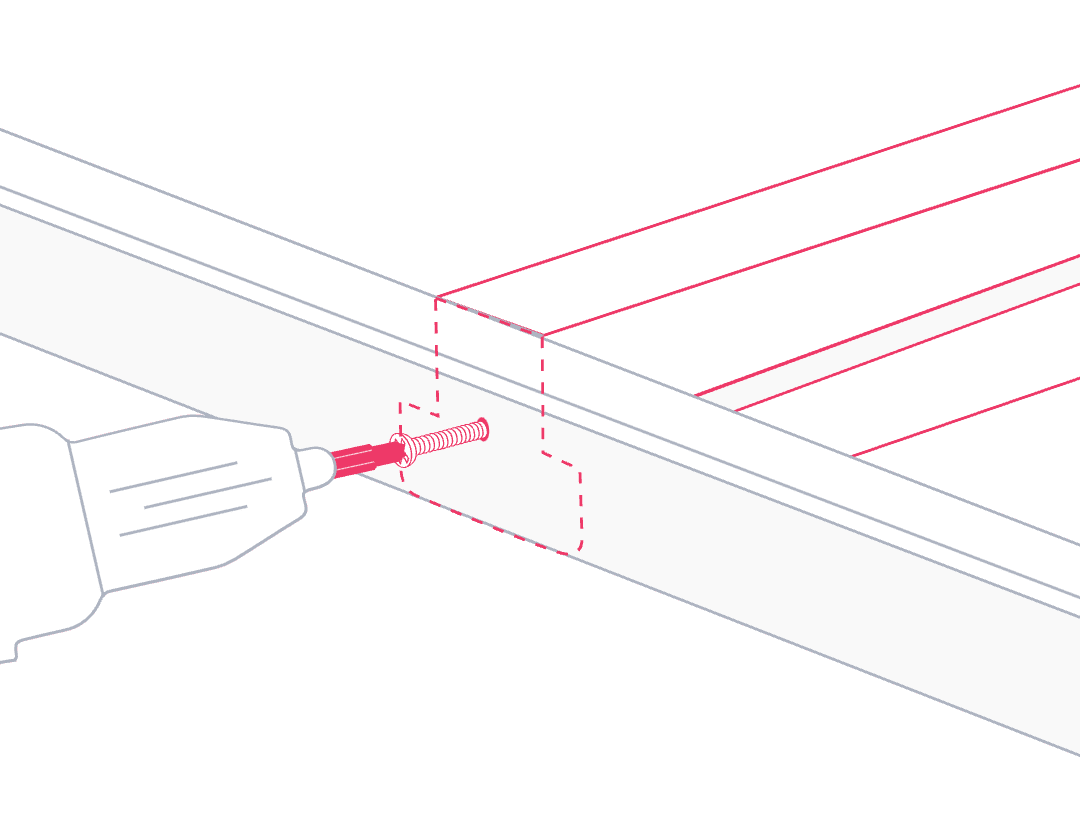
If you have T posts, screw them onto your shutter frame using your cordless drill and the long black screws in your custom kit. There are pre drilled holes on your shutter frame, to show where you'll attach the T posts. The top of your T post will be labelled t, and the bottom b.
C

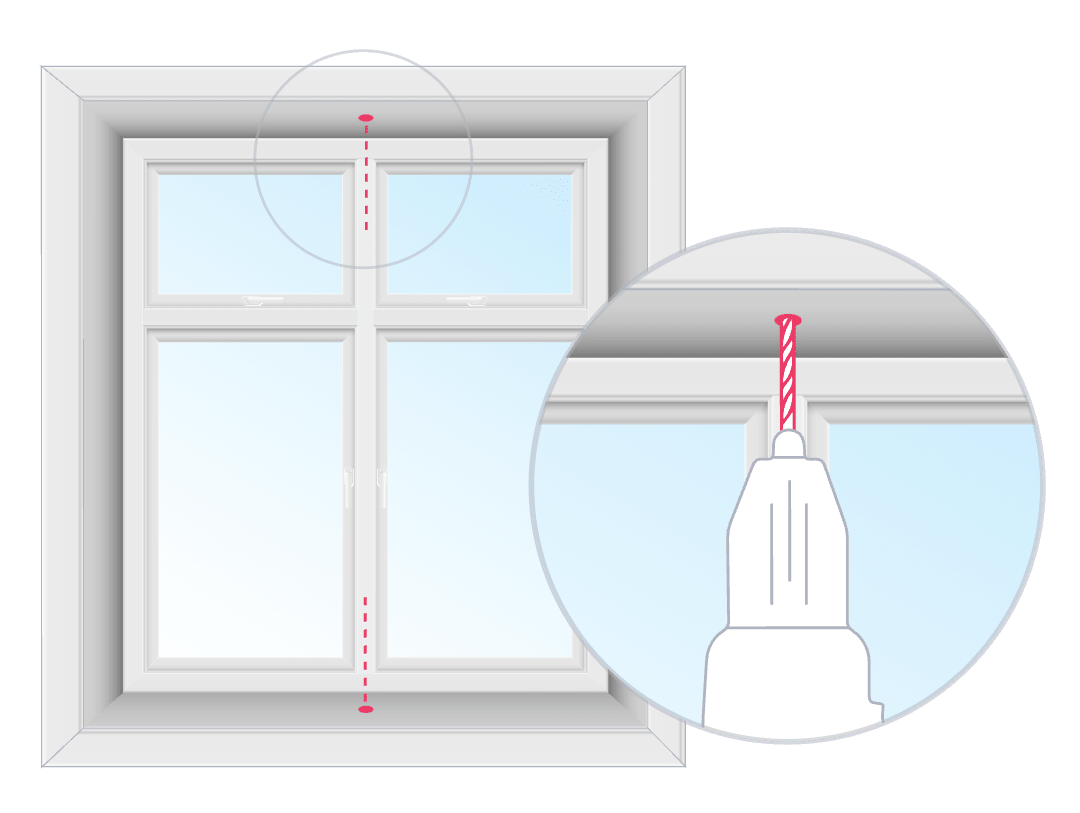
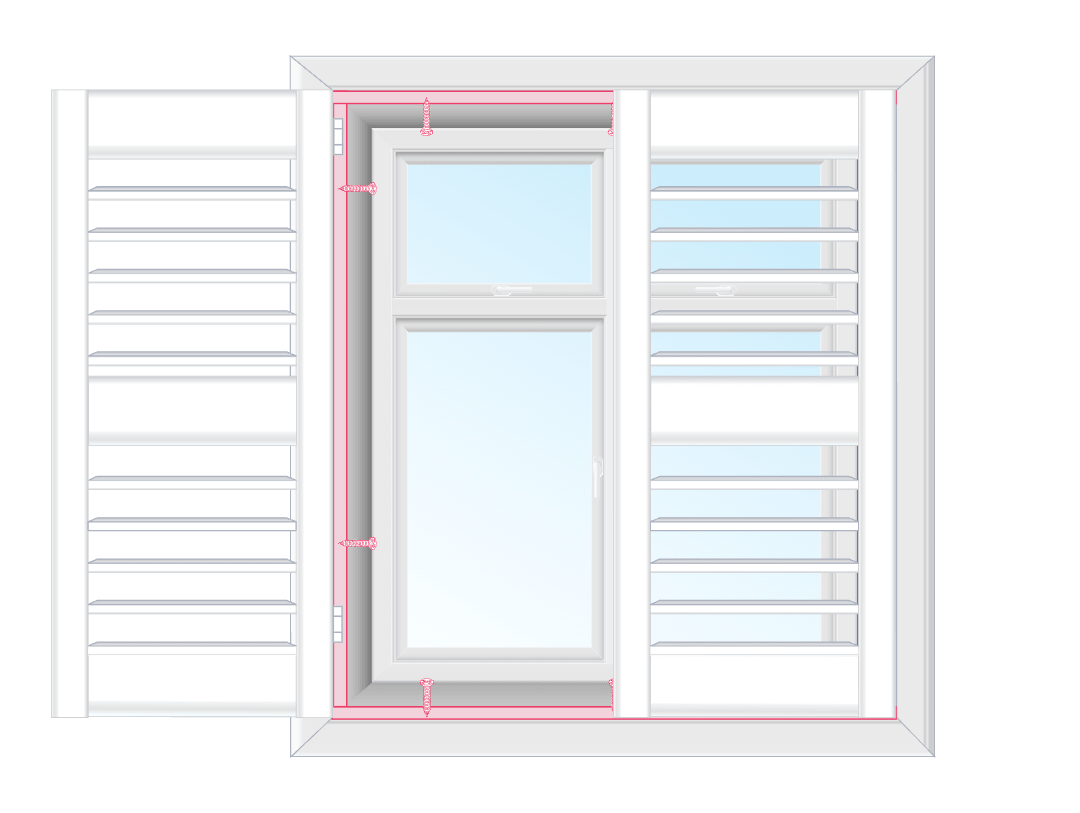
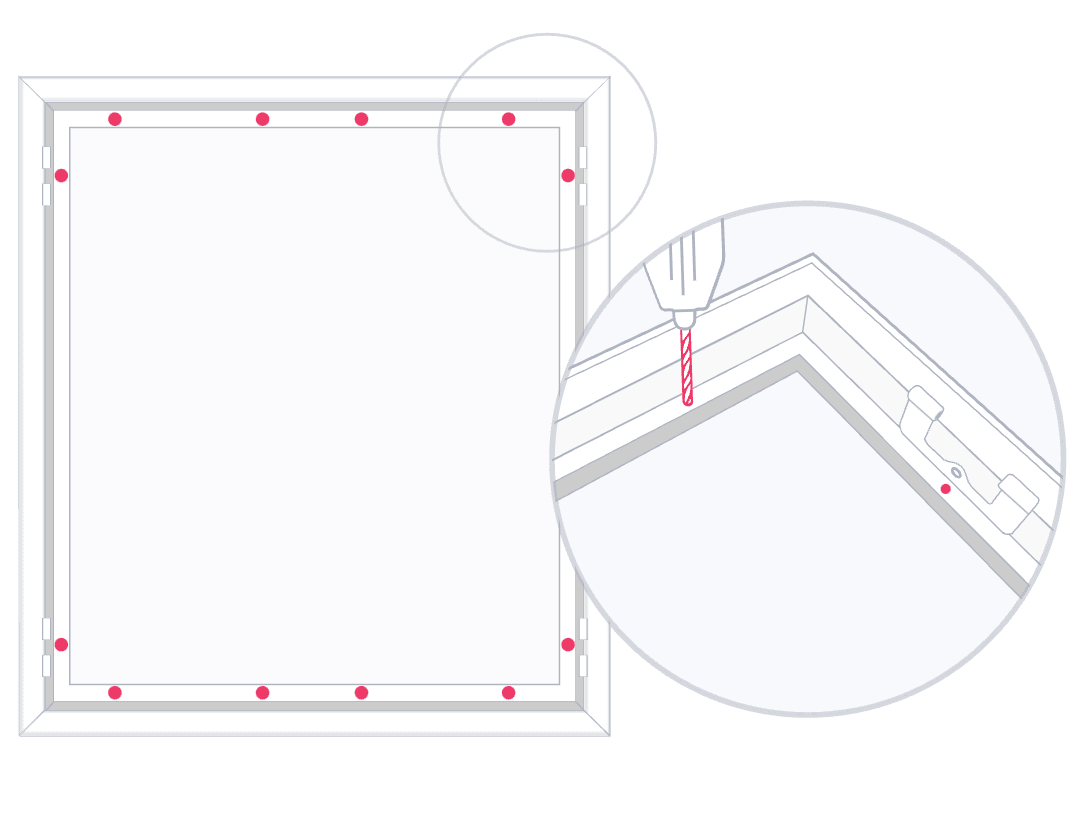
Turn over your shutter frame and lay it back down. Using your cordless drill with the 3 mm drill bit, drill holes through the back of the shutter frame, in line with each hinge. Also drill four, evenly spaced holes through the back of the shutter frame at both the top and the bottom. The back of the shutter frame will attach to your window frame.

3
Mount your shutter frame

A

Lift your frame into place, on the outside of your window frame. It can help to have two people for larger frames, so you don't bump the corners of your shutter frame.

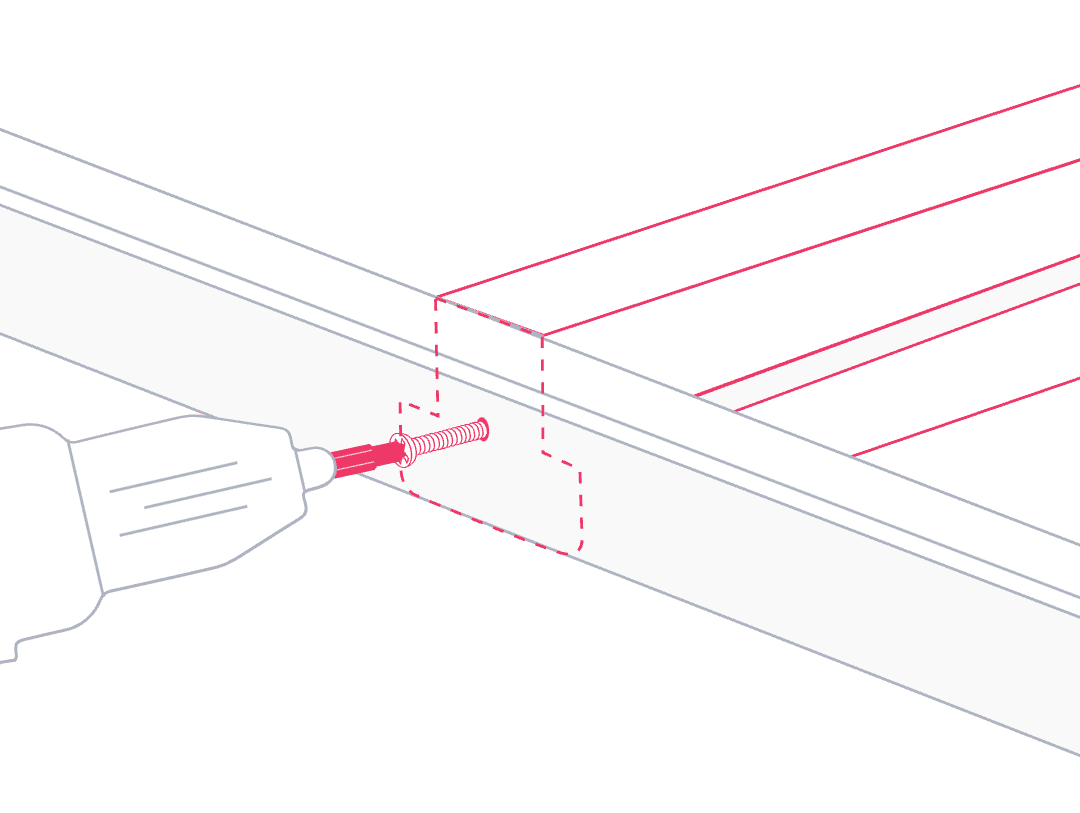
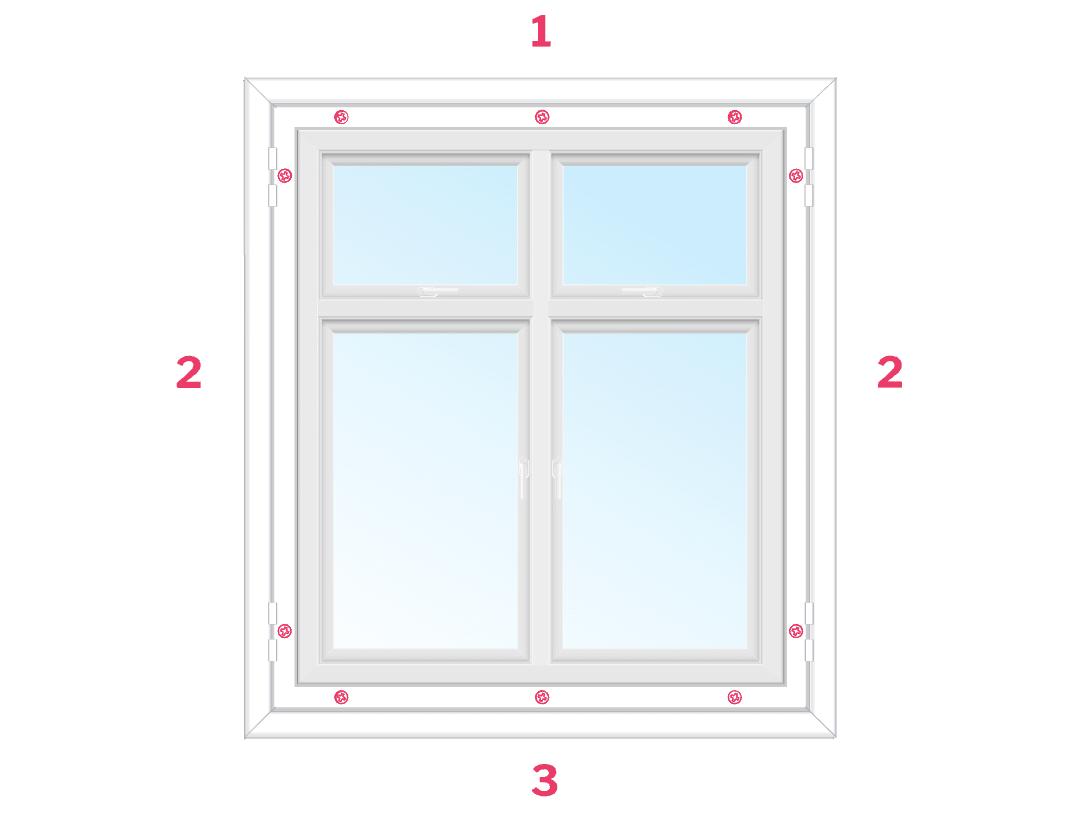
Drill each screw at the top of your shutter frame part way in, using your cordless drill with the Phillips head drill bit and the screws in your custom kit.

B

Wiggle the frame until you get it looking level across the top. You can rest a spirit level on top of the frame while you do this.

Tighten the top screws.
C

Drill in your side screws next, and then your bottom screws. You can check your shutter frame is even across the top by using a spirit level.

4
Attach your shutter panels and check your shutter frame

A

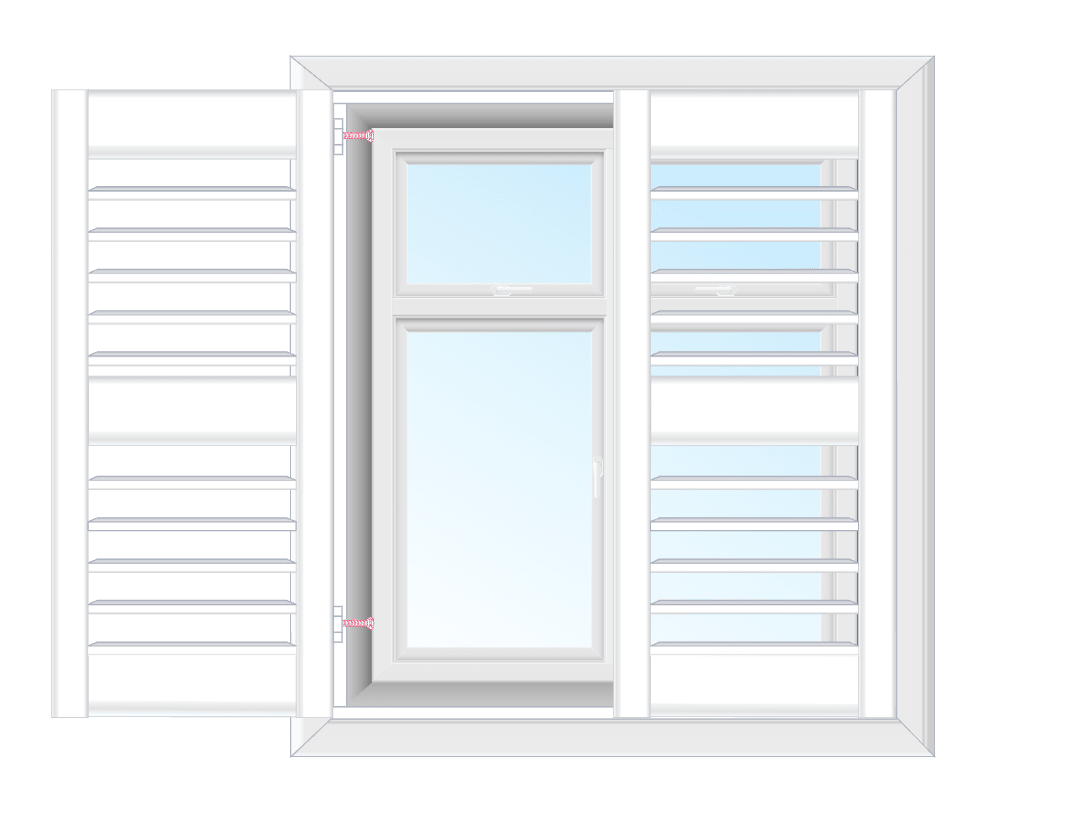
Remove any black bands from your hinge pins before you start. Pick up your left panel and hold into position. The brackets should line up on the left side of your shutter frame and your panel. Take a hinge pin and drop it through the bracket, from the top. Repeat for each panel.

B

Check that your panels open and close easily. As they can be heavy, it's normal if you need to lift the edge of the panel and nudge it on.

C

Check for a thin, even gap between each side of your shutter frame and your shutter panels.

Shutter panels won't stay closed? Check out the 'I need some extra help' section at the bottom.
5

Get Insta ready

Grab the stickers in your custom kit and stick them onto each visible screw.
1
Get organised

A

Unpack your kit, and gently lay it all out on a clean, hard surface or the cardboard packaging it came in. Be careful not to scratch the parts when moving them.

B

We label sections of your frame and your panels, which will help you to match up the right panels and hinges later. Lay out the shutter panels the right way up and in order from left to right.

2
Click your shutter frame together and screw holes

A

Click each section of your shutter frame together using the Hoffmann keys in your custom kit, and feel free to use your body weight.

The keys come attached to sections of your shutter frame. If they've fallen out that's OK, just slide them back in.

If you're finding it difficult, it's usually because the Hoffmann keys have come out on one side.

B

If you have T posts, screw them onto your shutter frame using your cordless drill and the long black screws in your custom kit. There are pre drilled holes on your shutter frame, to show where you'll attach the T posts. The top of your T post will be labelled t, and the bottom b.

C

Turn over your shutter frame and lay it back down. Using your cordless drill with the 3 mm drill bit, drill holes through the back of the shutter frame, in line with each hinge. Also drill four, evenly spaced holes through the back of the shutter frame at both the top and the bottom. The back of the shutter frame will attach to your wall.

3
Mount your shutter frame

A

Lift your frame into place, onto your wall. It can help to have two people for larger frames, so you don't bump the corners of your shutter frame.

Drill each screw at the top of your shutter frame part way in, using your cordless drill with the Phillips head drill bit and the screws in your custom kit. Remember it's best to attach your shutters to wall studs.

Using plaster wall anchors or screwing into concrete, stone, brick or tile? Check out our guide for attaching to different surfaces.

B

Wiggle the frame until you get it looking level across the top. You can rest a spirit level on top of the frame while you do this.

Tighten the top screws.

C

Drill in your side screws next, and then your bottom screws. You can check your shutter frame is even across the top by using a spirit level.

4
Attach your shutter panels and check your shutter frame

A

Remove any black bands from your hinge pins before you start. Pick up your left panel and hold into position. The brackets should line up on the left side of your shutter frame and your panel. Take a hinge pin and drop it through the bracket, from the top. Repeat for each panel.

Hinge pin not sliding in? Check if you have panels upside down or if your frame is attached upside down.

B

Check that your panels open and close easily. As they can be heavy, it's normal if you need to lift the edge of the panel and nudge it on.

C

heck for a thin, even gap between each side of your shutter frame and your shutter panels.

Shutter panels won't stay closed? Check out the 'I need some extra help' section at the bottom.

5

Get Insta ready

Grab the stickers in your custom kit and stick them onto each visible screw.
1
Get organised

A

Unpack your kit, and gently lay it all out on a clean, hard surface or the cardboard packaging it came in. Be careful not to scratch the parts when moving them.

B

We label sections of your frame and your panels, which will help you to match up the right panels and hinges later. Lay out the shutter panels the right way up and in order from left to right.

2
Click your shutter frame together and screw holes

A

Click each section of your shutter frame together using the Hoffmann keys in your custom kit, and feel free to use your body weight. The keys come attached to sections of your shutter frame. If they've fallen out that's OK, just slide them back in.

If you're finding it difficult, it's usually because the Hoffmann keys have come out on one side.

B

If you have T posts, screw them onto your shutter frame using your cordless drill and the long black screws in your custom kit. There are pre drilled holes on your shutter frame, to show where you'll attach the T posts. The top of your T post will be labelled t, and the bottom

Using your cordless drill with the 3 mm drill bit, drill holes through the inside of the shutter frame, in line with each hinge. Also drill two, evenly spaced holes through the inside of the shutter frame near both the top and the bottom corners.

3
Mount your shutter frame

A

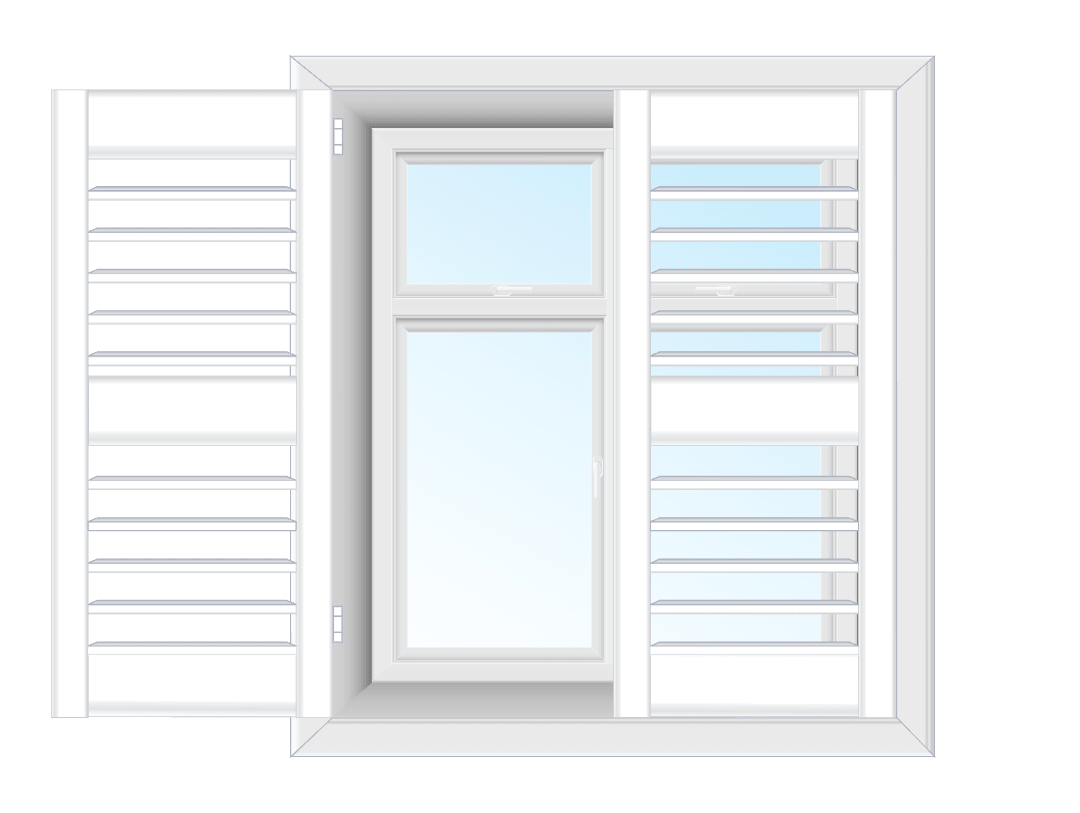
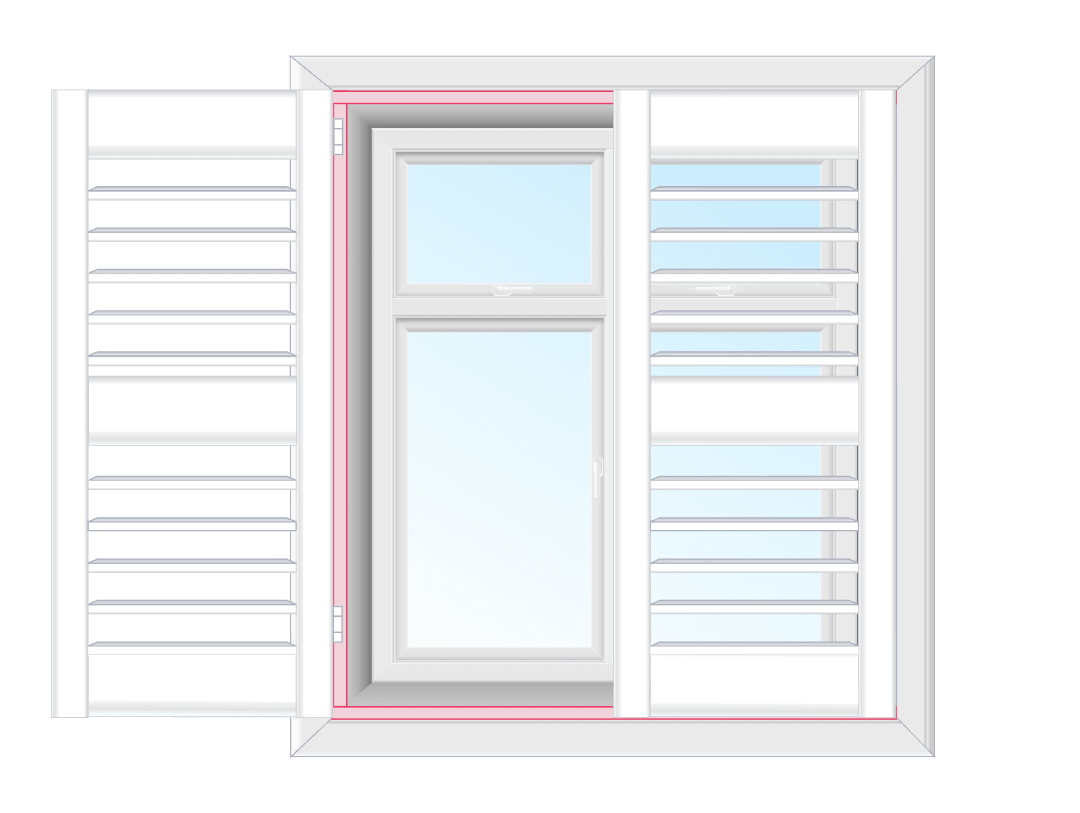
Lift your frame into place, on the inside of your window frame or recess. It can help to have two people for larger frames, so you don't bump the corners of your shutter frame. The front of the shutter frame should be flush with your wall, for a really seamless fit. And make sure there is an even gap between your shutter frame and your window frame or recess on all four sides.

Drill the screws part way in near the top corners of your shutter frame, using your drill with the Phillips head drill bit and the screws in your kit.

Screwing into concrete, stone, brick or tile? Check out our guide for attaching to different surfaces.

B

Wiggle the frame until you get it looking level across the top, then tighten the top screws. You can hold a spirit level on the underside of the frame at the top, to check the frame is level.

C

Drill in your side screws next, and then your bottom screws. It helps to back in and out any screws in the middle of your frame. If you over tighten them, it can make the frame bow.

You can check your shutter frame is still even by holding a spirit level on the underside of the frame at the top.

D

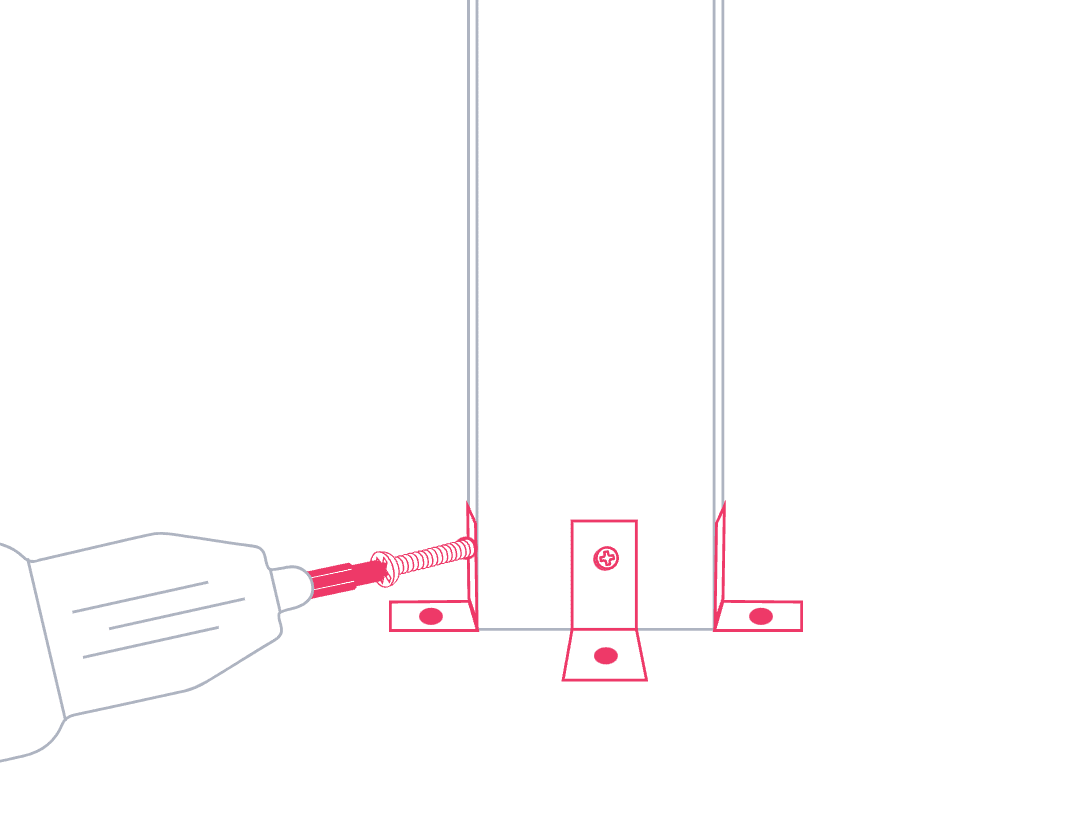
If you have a 3 sided frame with a T post(s) grab brackets for your T post. Attach the brackets to the bottom of your T post. Using your drill and the screws provided drill the brackets into your recess. For stability it's best to attach brackets to the left, right and back sides of each T post.

4
Attach your shutter panels and check your shutter frame

A

Remove any black bands from your hinge pins before you start. Pick up your left panel and hold into position. The brackets should line up on the left side of your shutter frame and your panel. Take a hinge pin and drop it through the bracket, from the top. Repeat for each panel.

Hinge pin not sliding in? Check if you have panels upside down or if your frame is attached upside down.

B

Check that your panels open and close easily. As they can be heavy, it's normal if you need to lift the edge of the panel and nudge it on.

C

Check for a thin, even gap between each side of your shutter frame and your shutter panels. You can slightly back out the screws in the middle of your shutter frame, to straighten the frame.

Shutter panels won't stay closed? Check out the 'I need some extra help' section at the bottom.

5
Get Insta ready

A

For 3 sided frames, lay your light block on the inside of your recess at the bottom, behind your shutter panels. If you have a window winder, you may need to cut the bottom light block in half using a hand saw, to fit either side of the winder. Check you can open and close your shutter panels easily, with the light blocks in place.

Screw the light block into your recess using your cordless drill with the Phillips head drill bit and 2 or 3 screws in your custom kit.

B

Screw the magnet catchers onto the front of your light block, using your cordless drill with the Phillips head drill bit and the small screws with the white heads in your custom kit. The magnet catchers on your light block, line up with the magnets on the back of your shutter panels. Shutter panels won't stay closed? Check out the 'I need some extra help' section at the bottom.

C

Caulk around the sides of your shutter frame to stop light seeping in. Grab the gap seal tube in your custom kit and pop it into your gap seal applicator gun, then follow the instructions on the gap seal tube. Move your gap seal applicator gun along each side, slowly and at a 45 degree angle. Wipe away excess with a damp cloth or your finger.

Let it dry and do it again if you've got a wide gap around the sides. It's best to do it in direct sunlight so you can see any areas you've missed.

1
Get organised

A

Unpack your kit, and gently lay it all out on a clean, hard surface or the cardboard packaging it came in. Be careful not to scratch the parts when moving them.

B

We label your shutter panels. Lay them the right way up and in order from left to right.

C

If you have T posts, measure and mark up where your T posts will go. You can check back to your panel measurements.

Pre-drill holes for the T post brackets into your window frame or recess using your cordless drill and the 3mm drill bit.

D

For stability it's best to attach brackets to the left, right and back sides of each T post at the top and bottom. Make sure there is an even gap between your posts and your recess at the top and bottom.

2
Mount your shutter panels

A

Lift up each panel into position, with the bracket on the inside edge of your window frame or recess. The front of the shutter panels should be flush with your wall, for a really seamless fit. And make sure there's an even gap between your panel and your window frame or recess at the top and the bottom.

B

Drill one screw into the top bracket and one screw into the bottom bracket using your cordless drill with the Phillips head drill bit and the screws in your custom kit. The screws go into the middle of the oval opening.

If you have T posts, follow the same steps to drill your panel brackets into your T posts.

Screwing into concrete, stone, brick or tile? Check out our guide for attaching to different surfaces.

C

Check that your shutter panel opens and closes smoothly. If the panel isn't level, loosen the screws and lift or drop the panel slightly. If you need to move it more than the screws will allow, take out the screws and reposition the panel.

Drill in all the screws for all the brackets, once your panel is completely level.

3
Screw in your light blocks and magnet catchers

A

Lay the pieces of light block on the inside of your window frame or recess, behind each shutter panel. The light blocks go inside your window frame or recess on all four sides. If you have a window winder, you may need to cut the bottom light block in half using a handsaw, to fit either side of the winder.

Check you can open and close your shutter panels easily, with the light blocks in place.

B

Screw each light block into your window frame or recess using your cordless drill with the Phillips head drill bit and 2 or 3 screws in your custom kit.

C

Screw the magnet catchers onto the front of your light blocks, using your cordless drill with the Phillips head drill bit and the small screws with white heads in your custom kit. The magnet catchers on your light block, line up with the magnets on the back of your shutter panels.

Shutter panels won't stay closed? Check out the 'I need some extra help' section at the bottom.

4
Get Insta ready

A

Grab the stickers in your custom kit and stick them onto each visible screw.
I need extra help

My shutters won't stay closed

OK, let's check if your shutter frame or panels are completely vertical. If it's on a slight angle or twisted, that's enough to stop the shutter panels from staying closed.

Outside the window frame (face fit) and Outside a frameless window (face fit frameless window)
Inside the window frame (recess fit)
Inside the window frame (direct mount)

A

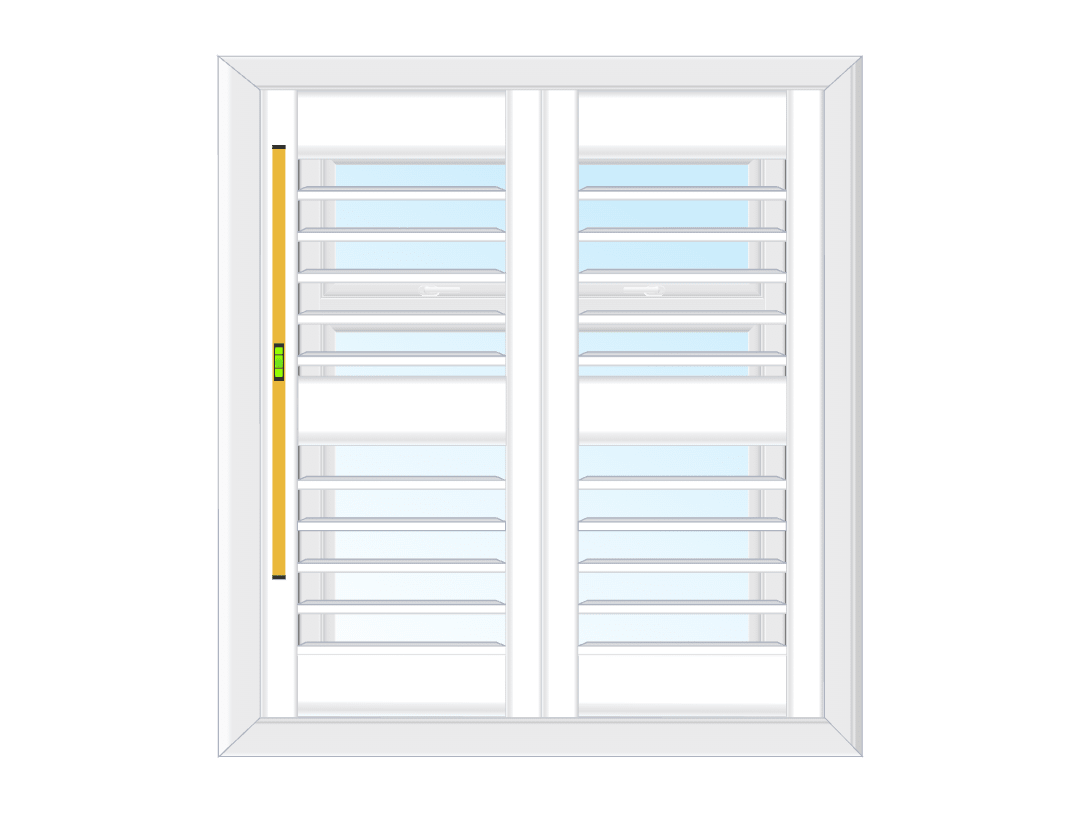
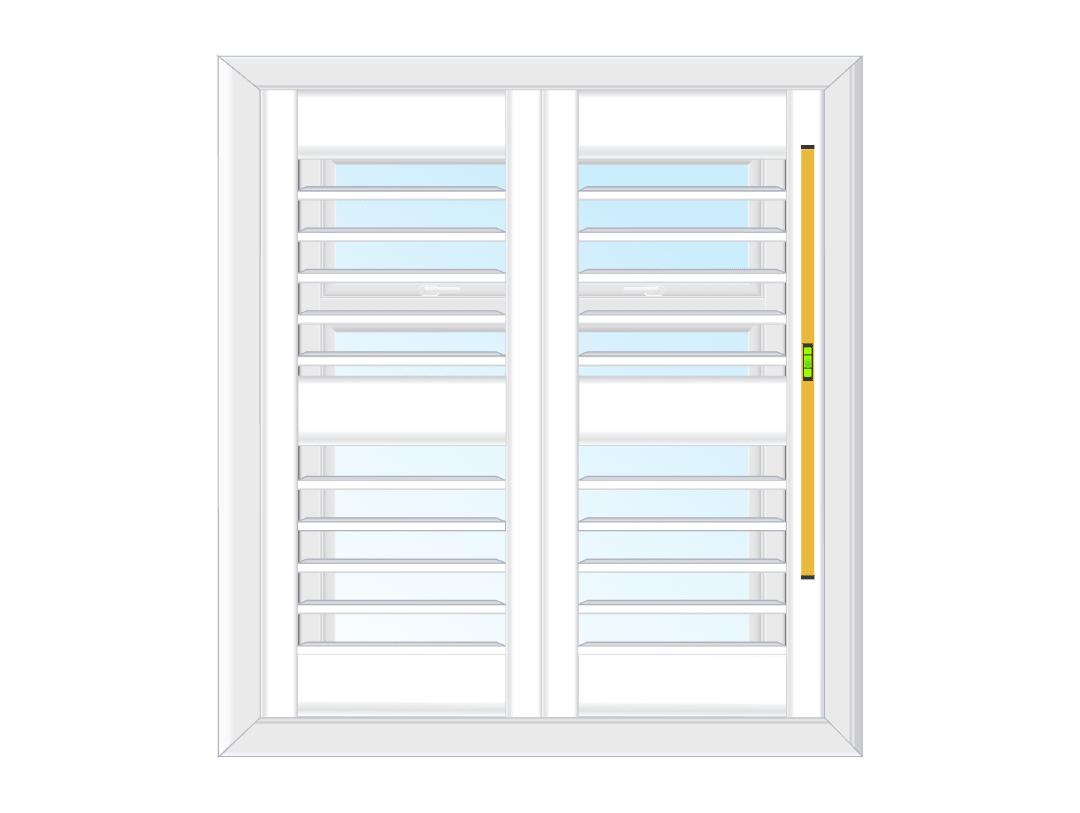
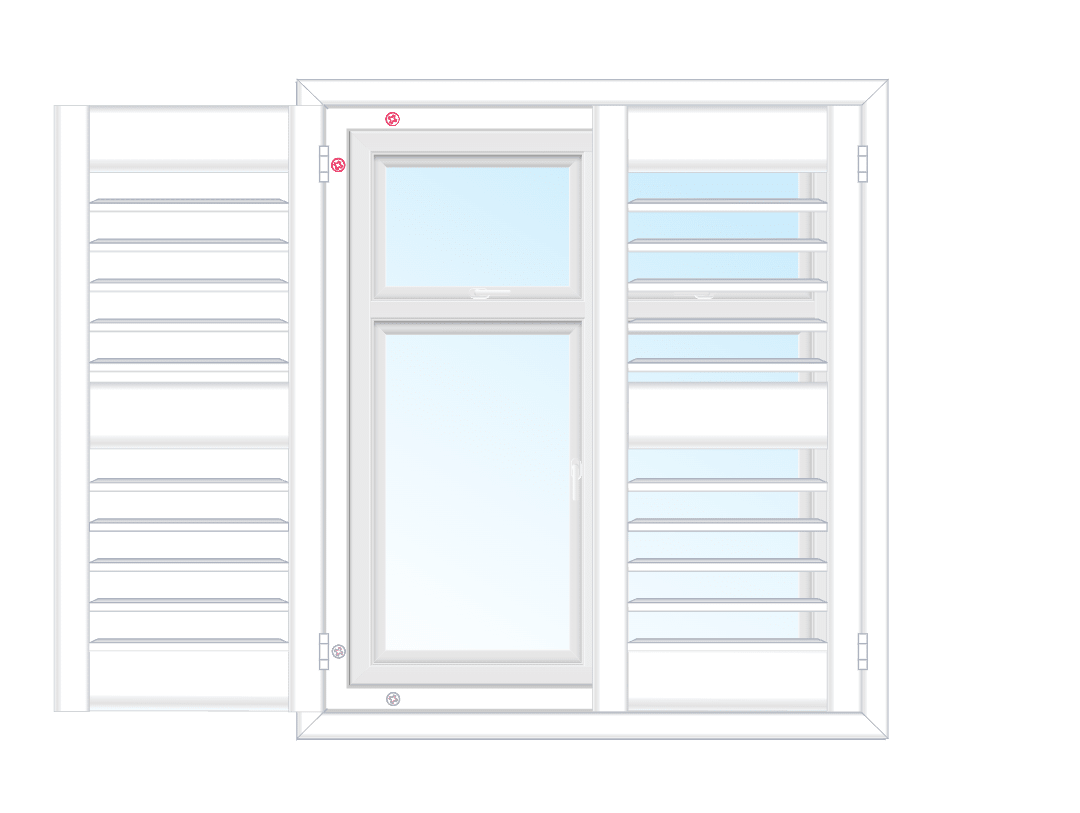
Check your shutter frame Place your spirit level on the front face of the shutter frame, to check if the frame is perfectly vertical. It might only be a small amount off, but you want it to be square. Check on both sides of the frame
B

Make your shutter frame vertical If the shutter frame isn't vertical, undrill the screws part way at either the top or the bottom (whichever is sitting deeper), using a cordless drill with a Phillips head drill bit. Undrill the side screws part way too, and gently bring the top or the bottom of the frame slightly forward. You can hold up a spirit level and check when it's vertical on each side. Check to see if your panels stay closed.

C

Tighten your screws Tighten the screws back in using your cordless drill, keeping the frame vertical. You can also caulk where there's a gap.

If this still doesn't fix it, give us a call and we can help.
A

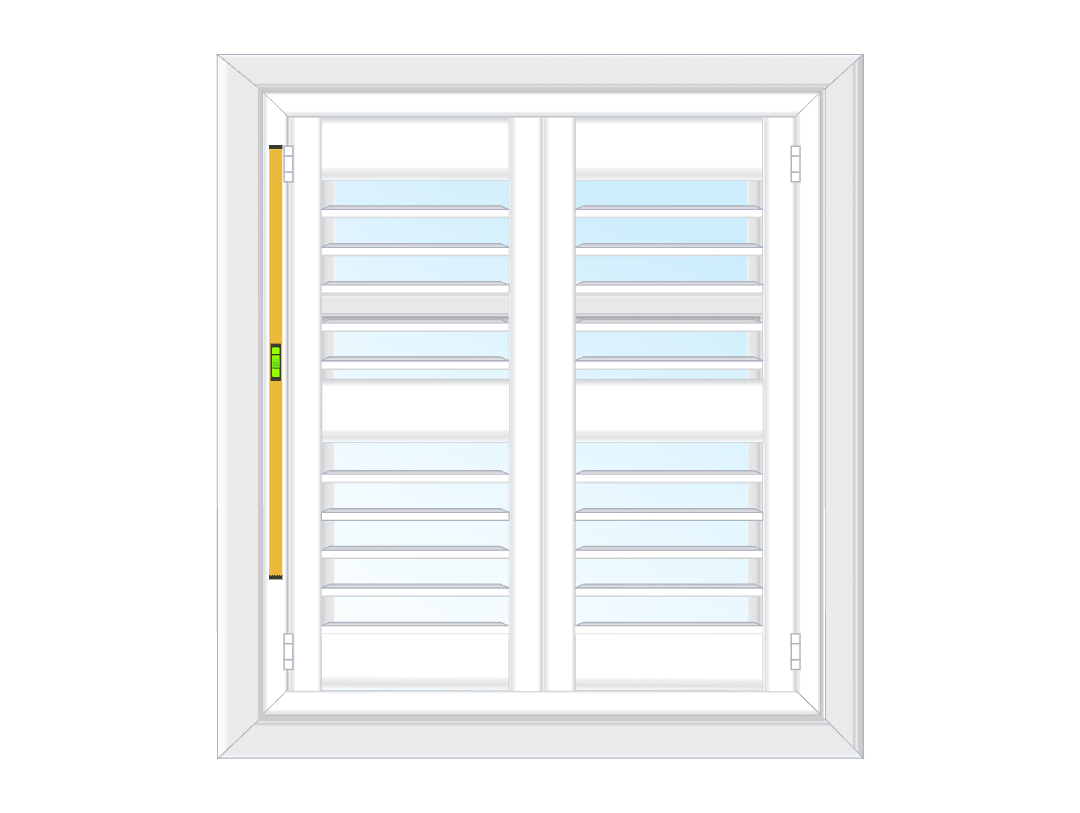
Check your shutter frame Place your spirit level on the front face of the shutter frame, to check if the frame is perfectly vertical. It might only be a small amount off, but you want it to be square. Check on both sides of the frame.

B

Make your shutter frame vertical If the shutter frame isn't vertical, undrill every screw in your frame, using your cordless drill with a Phillips head drill bit. Bring the top or the bottom of the frame slightly forward (whichever is sitting deeper). You can hold up a spirit level and check when it's vertical on each side. Check to see if your panels stay closed.

C

Tighten your screws Drill all your screws back in, keeping the frame vertical. Follow step 3 of this guide, to drill screws in the right order.

If this still doesn't fix it, give us a call and we can help.
A

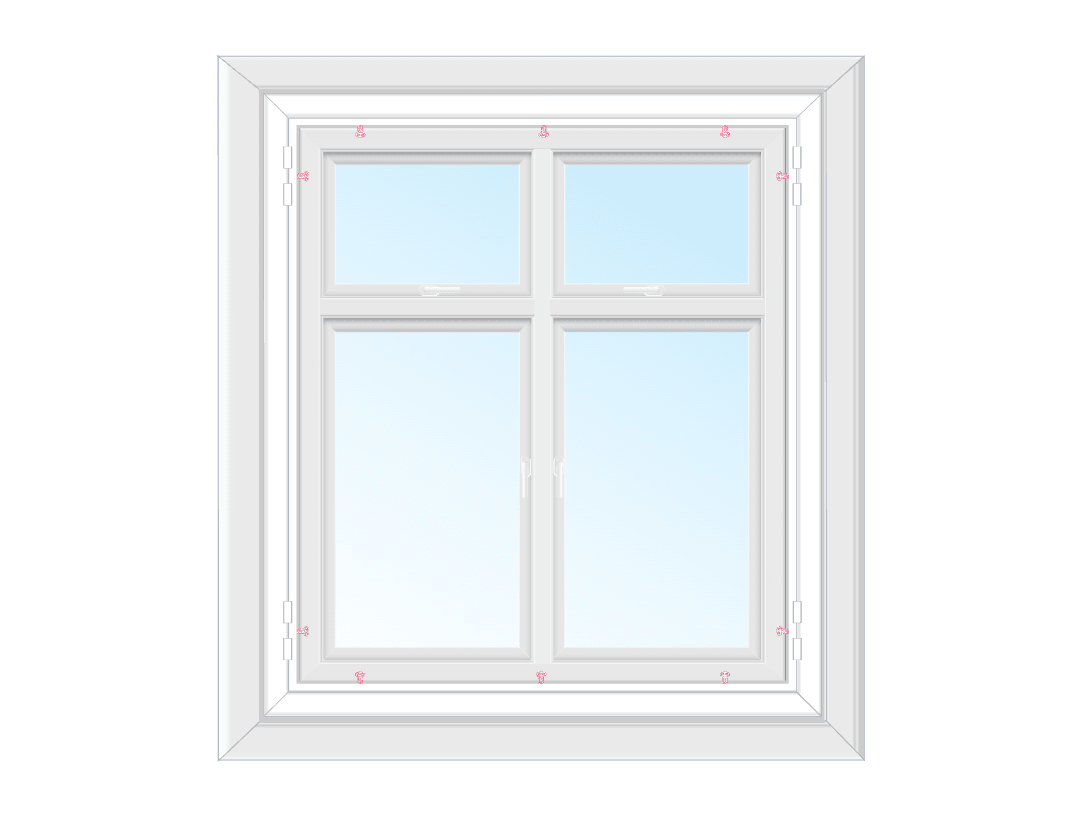
Check your shutter frame Place your spirit level on the front face of your shutter panels, to check if the panels are perfectly vertical. They might only be a small amount off, but you want them to be square.

B

Make your shutter frame vertical If your shutter panels aren't vertical, undrill the screws on all your brackets, using your cordless drill with a Phillips head drill bit. Bring the top or the bottom of the panel slightly forward (whichever is sitting deeper). You can hold up a spirit level and check when the panel is vertical. Check to see if your panels stay closed. If you have T posts, follow this step to make your T posts vertical.

C

Tighten your screws Drill the screws back in using your cordless drill, keeping the panel vertical.

If this still doesn't fix it, give us a call and we can help.
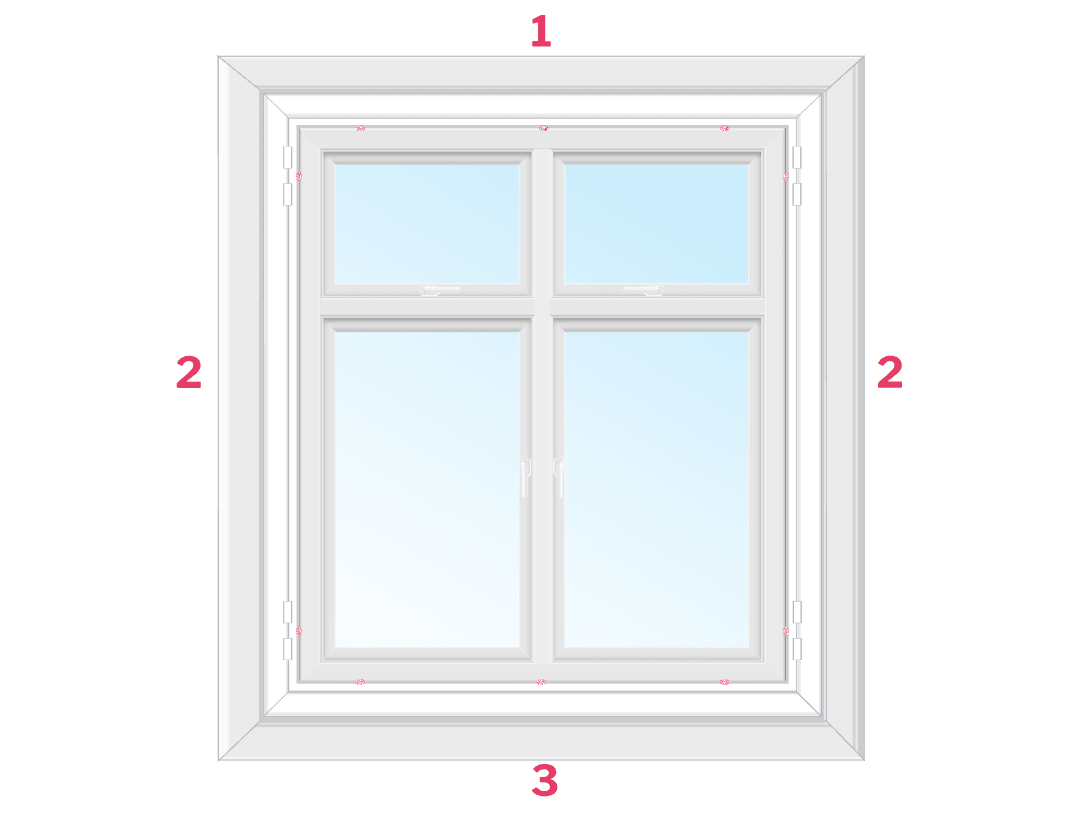
My louvers are hard to rotate, or they're loose

The good news is they're easy to loosen or tighten.

First find the tension screws on your shutter panels. They're on the side opposite your hinges and have a round plastic sticker over them.

Turn the screws to tighten or loosen your louvers. You have one screw for each section of louvers (as connected by the tilt bar at the back).
We’re here to help with any questions
Support

We’re here to help with any questions

Whether you're midway through installing your blinds or just getting started, our team is here to help. From measuring guides to installation tips, we’ve got answers to make things simple and stress-free. Contact us on 1300 918 390 (AEDT).