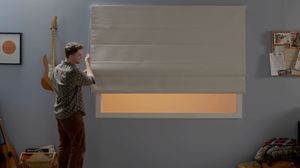
The easy way to install roman blinds with a chain drive
Welcome to our simple guide for installing your new, custom roman blinds. Your custom kit is super easy to use, so have fun as you click, slide and lock parts together.
Before you get going
Your custom kit:
 A
A
 B
B
 C
C
 D
D
OK it's time to start installing,
let's take it step by step
Installing your blind is easy and fun. Follow these 4 steps, then kick back and admire a job well done.
Here's how to do it:
1 Get organised
-
A
Unpack your custom kit, and lay out your roman blind on a clean floor, under your window.
2 Installing the brackets
-
A
The brackets are to be fixed directly to the architrave or wall, spaced evenly. If you have allowed for your blind to be mounted above the architrave, measure the height you allowed for in your original measurements and mount your bracket at this point.
Position the outer brackets approximately 50mm from the edge of the blind and space the remaining brackets evenly across the width of the blind.
-
B
Mark if necessary and pre drill 2 holes per bracket. After drilling holes, secure the brackets with screws (wood screws have been provided).
Make sure all brackets are level.
3 Positioning the blind
-
A
Care must be taken when lifting the Roman Blinds. Ensure that the head rail is fully supported at all times and that all brackets are in place before positioning.
-
B
Lift the blind into place so it’s evenly spaced with the brackets and central to the window.
Place the top front ridges of the head rail into the upper front edges of the bracket.
-
C
Click in place. When the blind is evenly in place, push the back of the head rail towards the wall until it clicks into the bottom section of the bracket.
4 Make it child safe
-
A
Click the p clip onto the bottom of the chain loop, then hold it into position and mark a dot where the screw will attach the p clip to the frame or wall. Remember the chain should hang down with minimal tension.
-
B
Screw the p clip onto your frame or wall, using your cordless drill with the Phillips head drill bit. Remember that attaching to a wooden frame or wall studs is best, otherwise do your homework.
-
C
We take Australian child safety laws seriously. They state you must install a P clip if the chain is less than 1.6 metres from the floor. This is to prevent any risk of strangulation. See 'Let's get real about child safety' at the bottom for more info.


Congrats, you did it! Before you kick back and admire a job well done, don’t forget to snap some photos and share your look with us. And tag us on Instagram to really make our day.
Let's get real about child safety.
Children don't understand that a chain wrapped around their neck can tighten and strangle them in just a few minutes if they sit down, roll around or climb down to the floor.
Children have died when the loop went over their head or they got tangled in a loose chain while:
- sleeping in a cot or bed near to where chains are hanging
- playing near chains, or
- standing on a chair, sofa or bed to look out of a window.
You must follow the Australian Government requirements when installing your blind.
- Install your p clip exactly as per step 5 of this guide
- Don't remove the warning label that comes attached to your blind
- Attach your own label with your name and contact details (or the details of whoever is installing your blind for you)
I need some extra help
Have a question? We’re here to help
1300 918 390
Mon to Fri 9am - 5pm
